

Alarm Manage
Function Overview
The Alarm-Management page allows users to customize monitoring and alarm rules according to their own business needs. It helps users detect and resolve issues in a timely manner, ensuring business stability. Currently, the Alarm-Management page supports functions such as configuring alarm rules, viewing historical alarms, setting notification templates, and managing lists of frequently used contacts.
Application Scenarios
Preventing Surges in Origin-Return Bandwidth
Some business types have prominent burst characteristics, such as e-commerce platforms and game platforms. Under normal circumstances, the CDN service distributes access traffic to edge nodes across the country to avoid excessive traffic back to the origin server. However, in special cases (e.g., cache flushing), the origin-return traffic may surge significantly. Configuring monitoring policies for this scenario enables you to detect and address the issue promptly.
Perceiving Cache Service Status
By monitoring the status codes returned after end-users send requests, you can immediately check whether the resources returned by the current service are normal. If an abnormal number or frequency of error status codes is detected, you can take targeted measures to rectify the issue.
Description of Monitoring Metrics
- Billing Bandwidth: All bandwidth volumes subject to payment after the CDN service is enabled. Recorded every minute, it helps you obtain continuous billing data over a specific time period.
- Origin-Return Bandwidth: All bandwidth values generated when retrieving resources from the origin server after the CDN service is enabled. Recorded every minute, it helps you obtain continuous billing data over a specific time period.
- Proportion of Requests by Status Code: The proportion of requests with status codes 2XX/3XX/4XX/5XX to the total number of requests in the selected time interval.
- Number of Requests by Status Code: The total count of requests with status codes 2XX/3XX/4XX/5XX out of all requests in the selected time interval.
Operation Guide
Adding & Viewing Alarm Policies
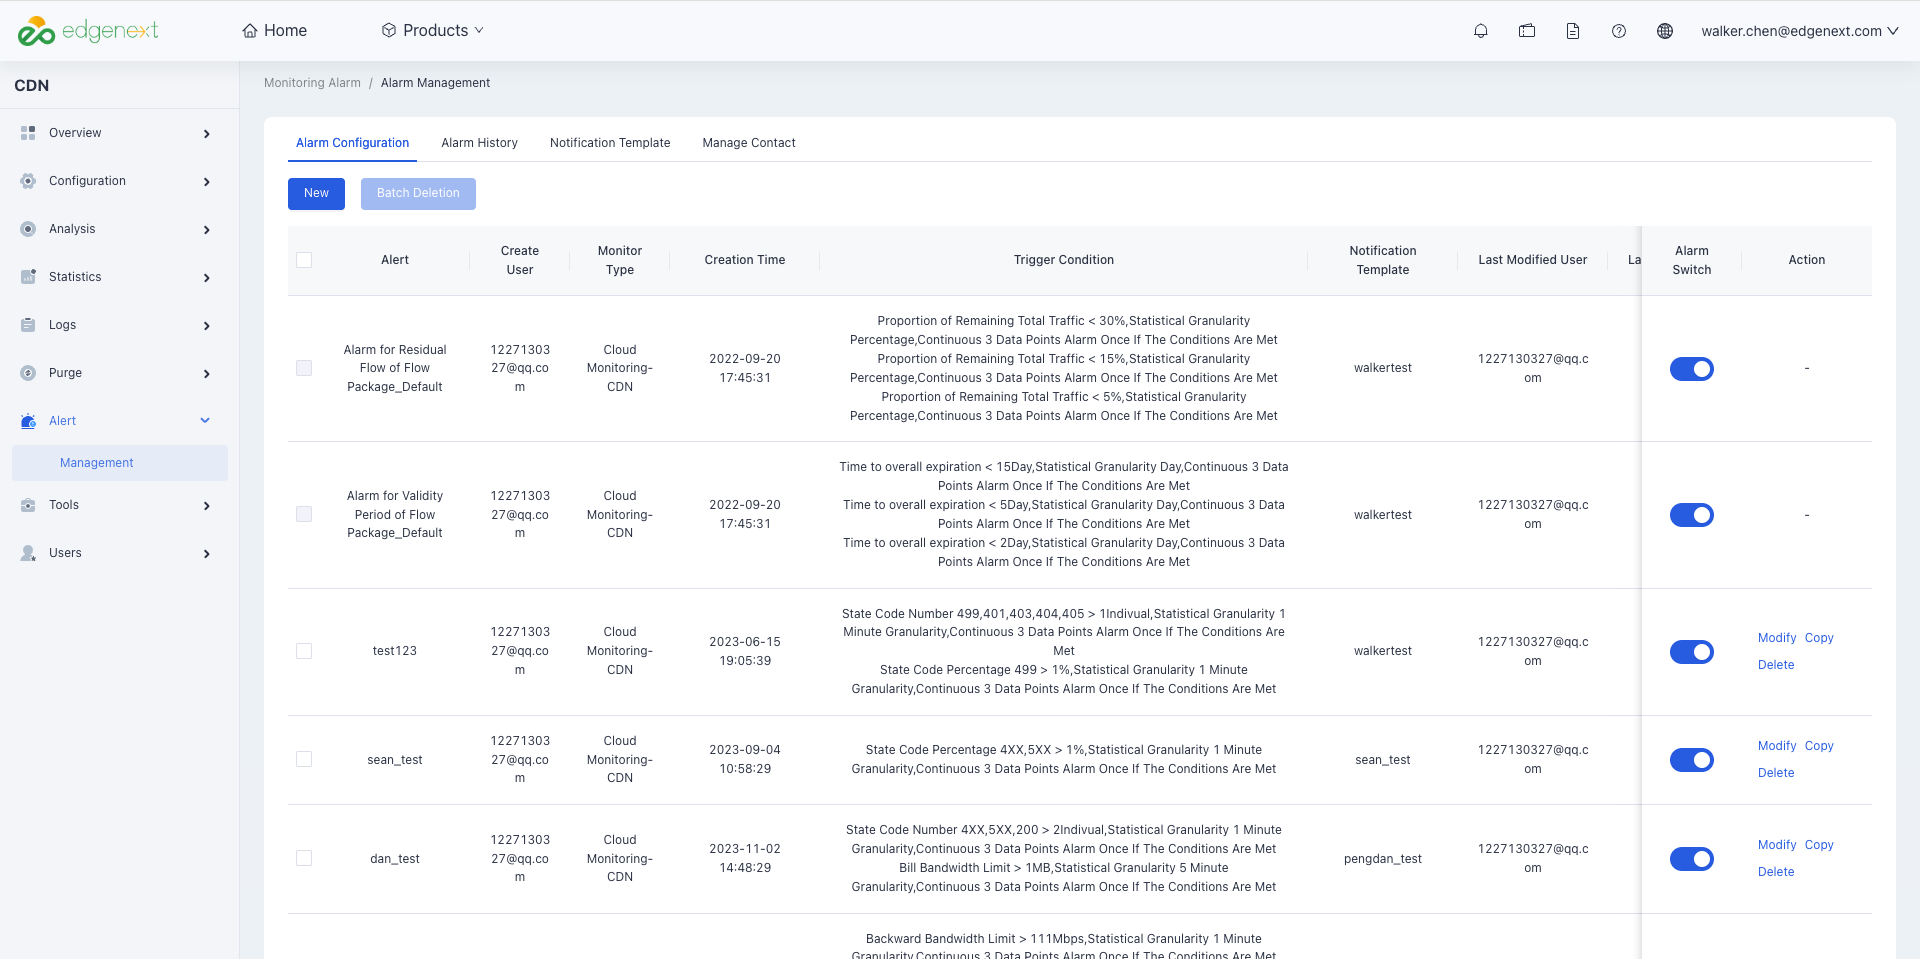
You can view existing alarm policies on the Alarm-Management page, including policy name, configured account, monitoring type, creation time, specific policy rules, notification template information, and last modification time.
Prerequisites:
- Add necessary alarm contacts via the "Manage Contact" function under the Alarm-Management page (i.e., pre-enter the relevant personnel and contact information to be notified for monitoring alerts). For detailed steps, see the "Manage Contact" section in this guide. (Mandatory step)
- Use the alarm contacts added in Prerequisite 1 to configure alarm notification templates (i.e., define how and to whom alerts should be sent when an alarm is triggered). For detailed steps, see the "Notification Template" section in this guide.
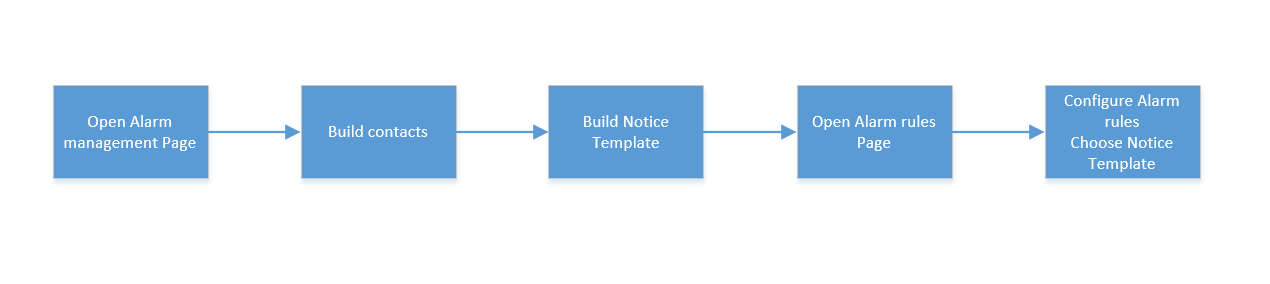
Overall Process of Adding an Alarm:
Specific Steps:
- Log in to the CDN console and click [Alarm-Management] in the left sidebar.
- Click the "New" button in the upper left corner to open the pop-up window for creating a new alarm policy.
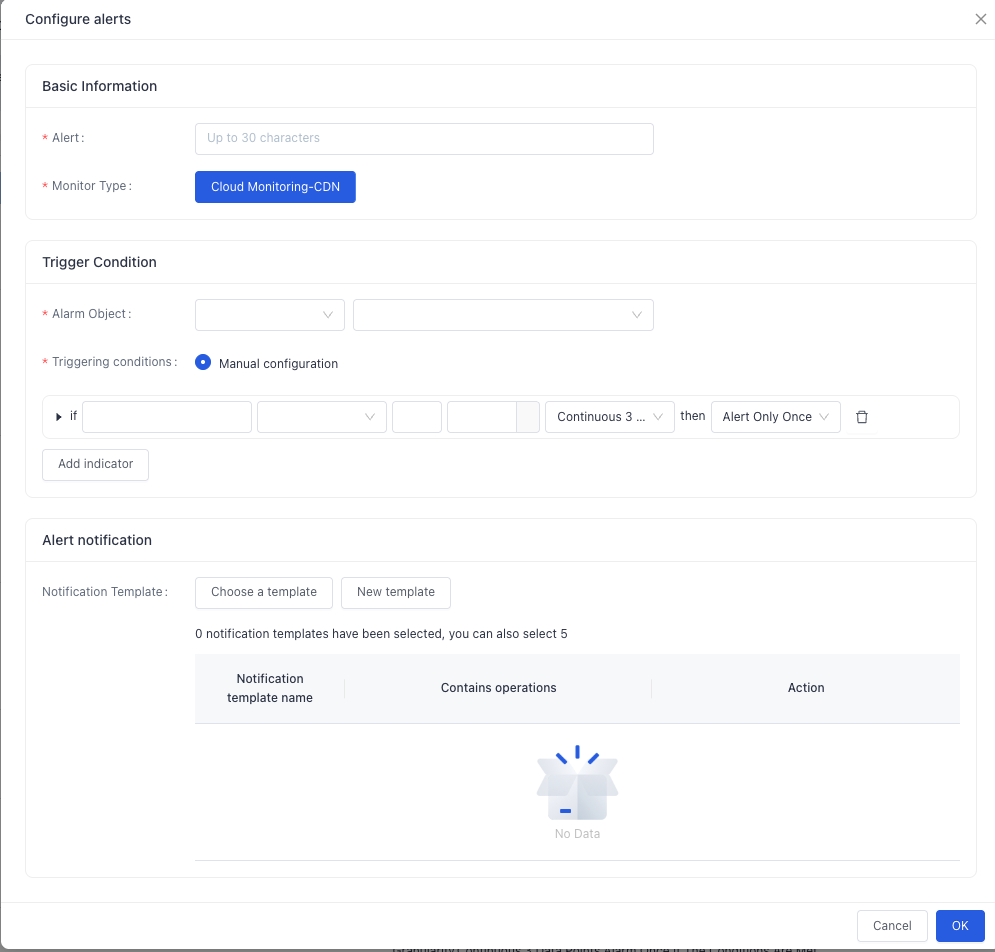
- Alarm policy configuration consists of three parts: Basic Information, Trigger Condition, and Alarm Notifications.
- In the Basic Information section, enter the Alert name and select the Monitor type (only "Cloud Monitoring - CDN" is available currently).
- In Trigger Condition, select the domain to monitor (multiple selection supported), and configure trigger conditions including monitoring metrics, monitoring granularity, comparison method, monitoring cycle, number of alarm triggers, etc. Multiple trigger conditions can be added, and the alarm will be triggered if any one condition is met.
- For operations related to notification templates, refer to the "Notification Template" module in this section.
Editing Alarm Policies
To modify, delete, enable, or disable existing alarm policies, use the alarm switch and operation options on the right side of the page.
- On the alarm policy list page, locate the policy to edit and toggle the switch on the right to enable/disable it (enabled by default).

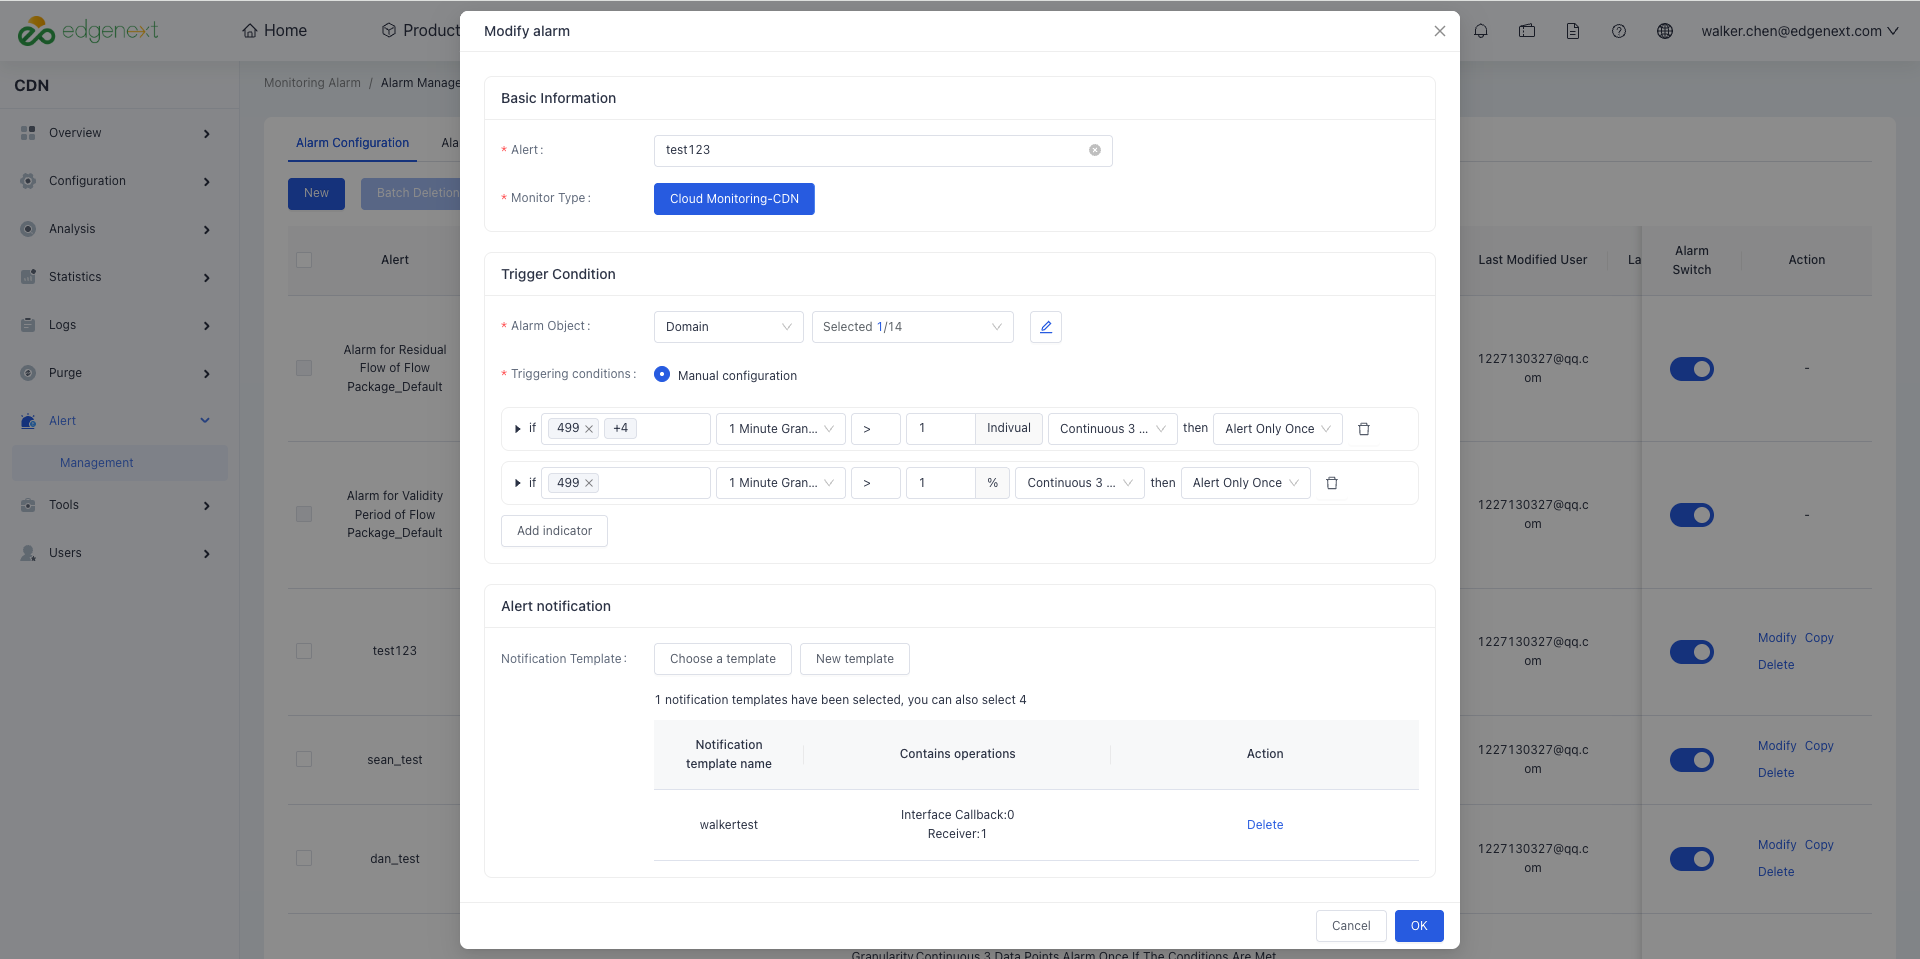
- On the alarm policy list page, locate the policy to edit and click the "Modify" button on the right to update its Trigger Condition.
Notification Template
A clear notification template must be selected when creating an alarm policy to ensure the policy takes effect. You can pre-configure required alarm notification templates on the Notification Template page.
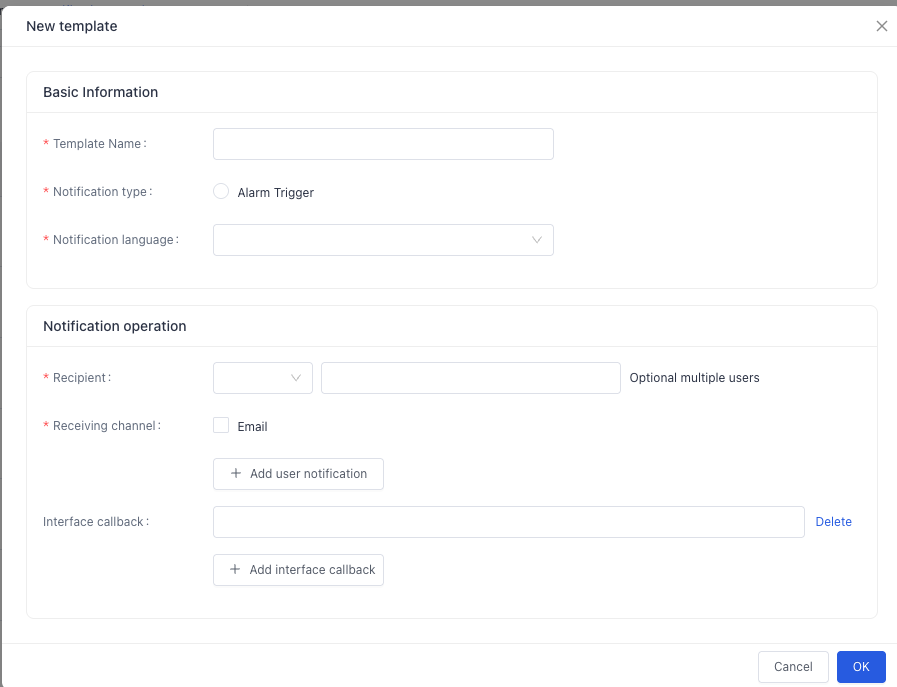
- Click the "New" button in the upper left corner to open the template creation page, and fill in the notification template information as required.
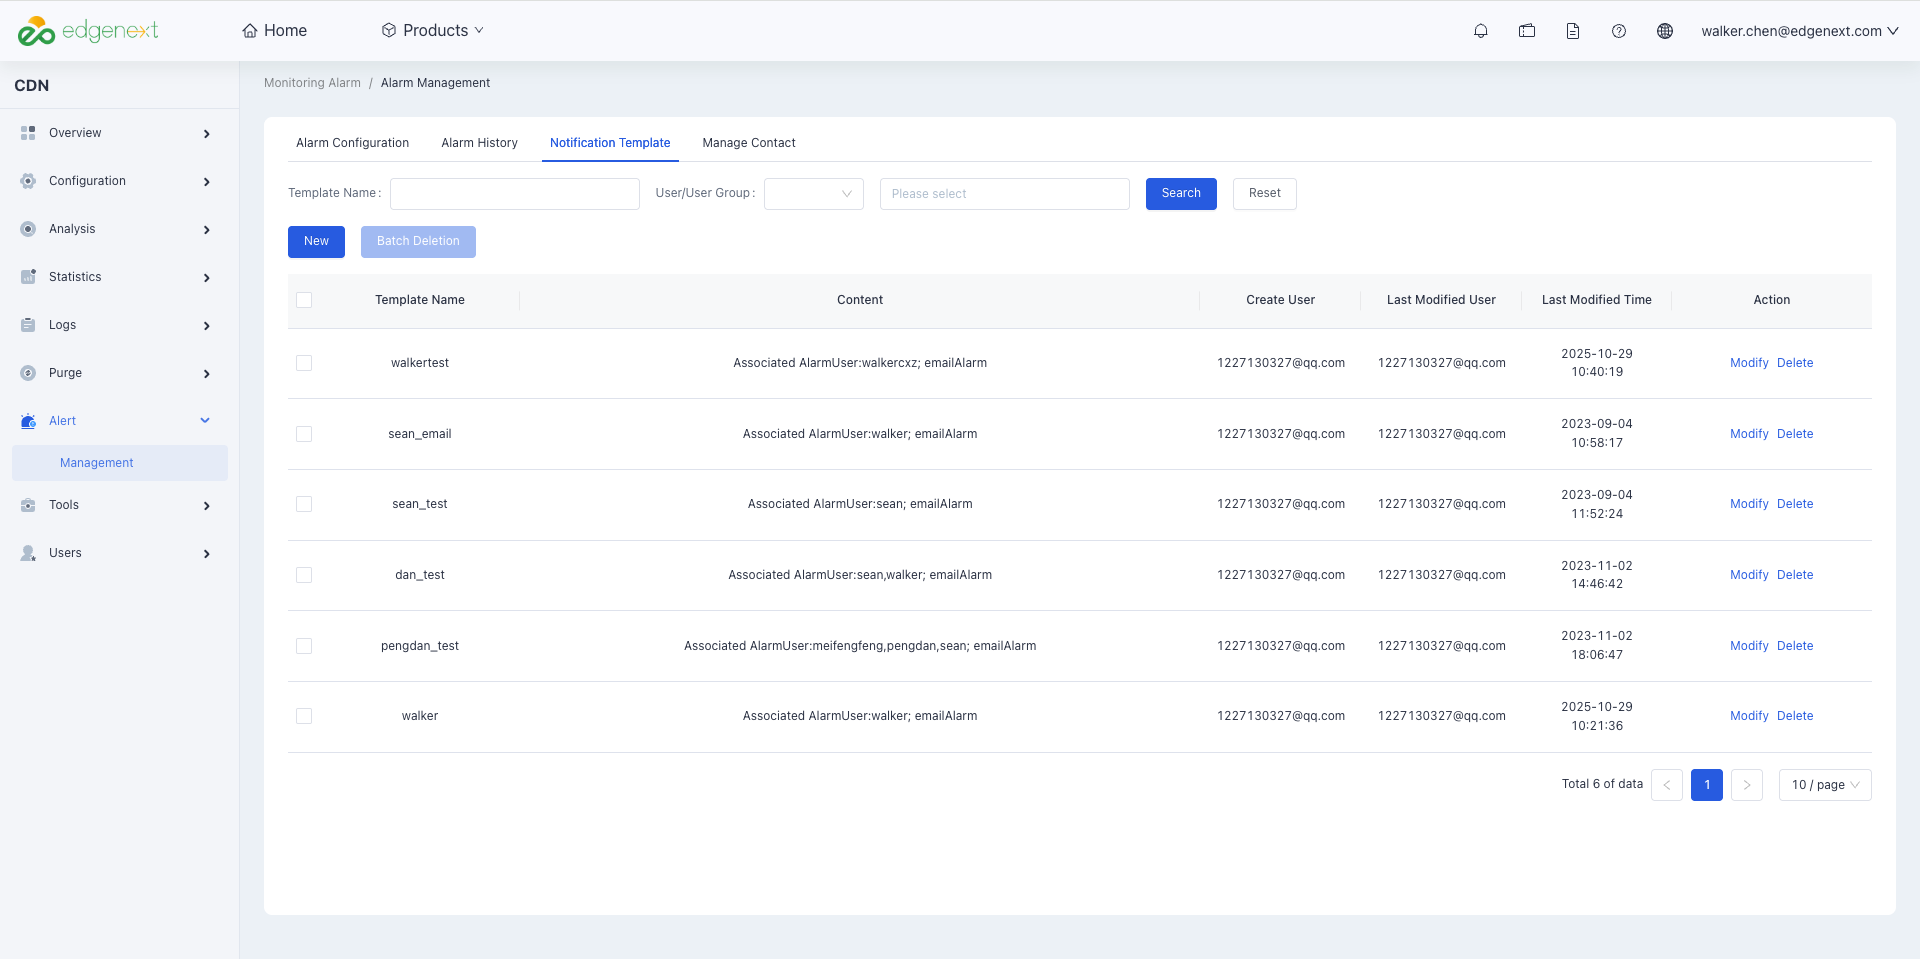
- Before creating a new notification template, select the notification objects (contacts to be notified must be pre-configured). For detailed steps, see the "Manage Contact" module in this section.
Manage Contact
You can customize and manage frequently used alarm handlers and stakeholders via the Manage Contact page. These contacts can then be quickly added to alarm policies.
- Open the Alarm-Management page and select the "Manage Contact" tab at the top.
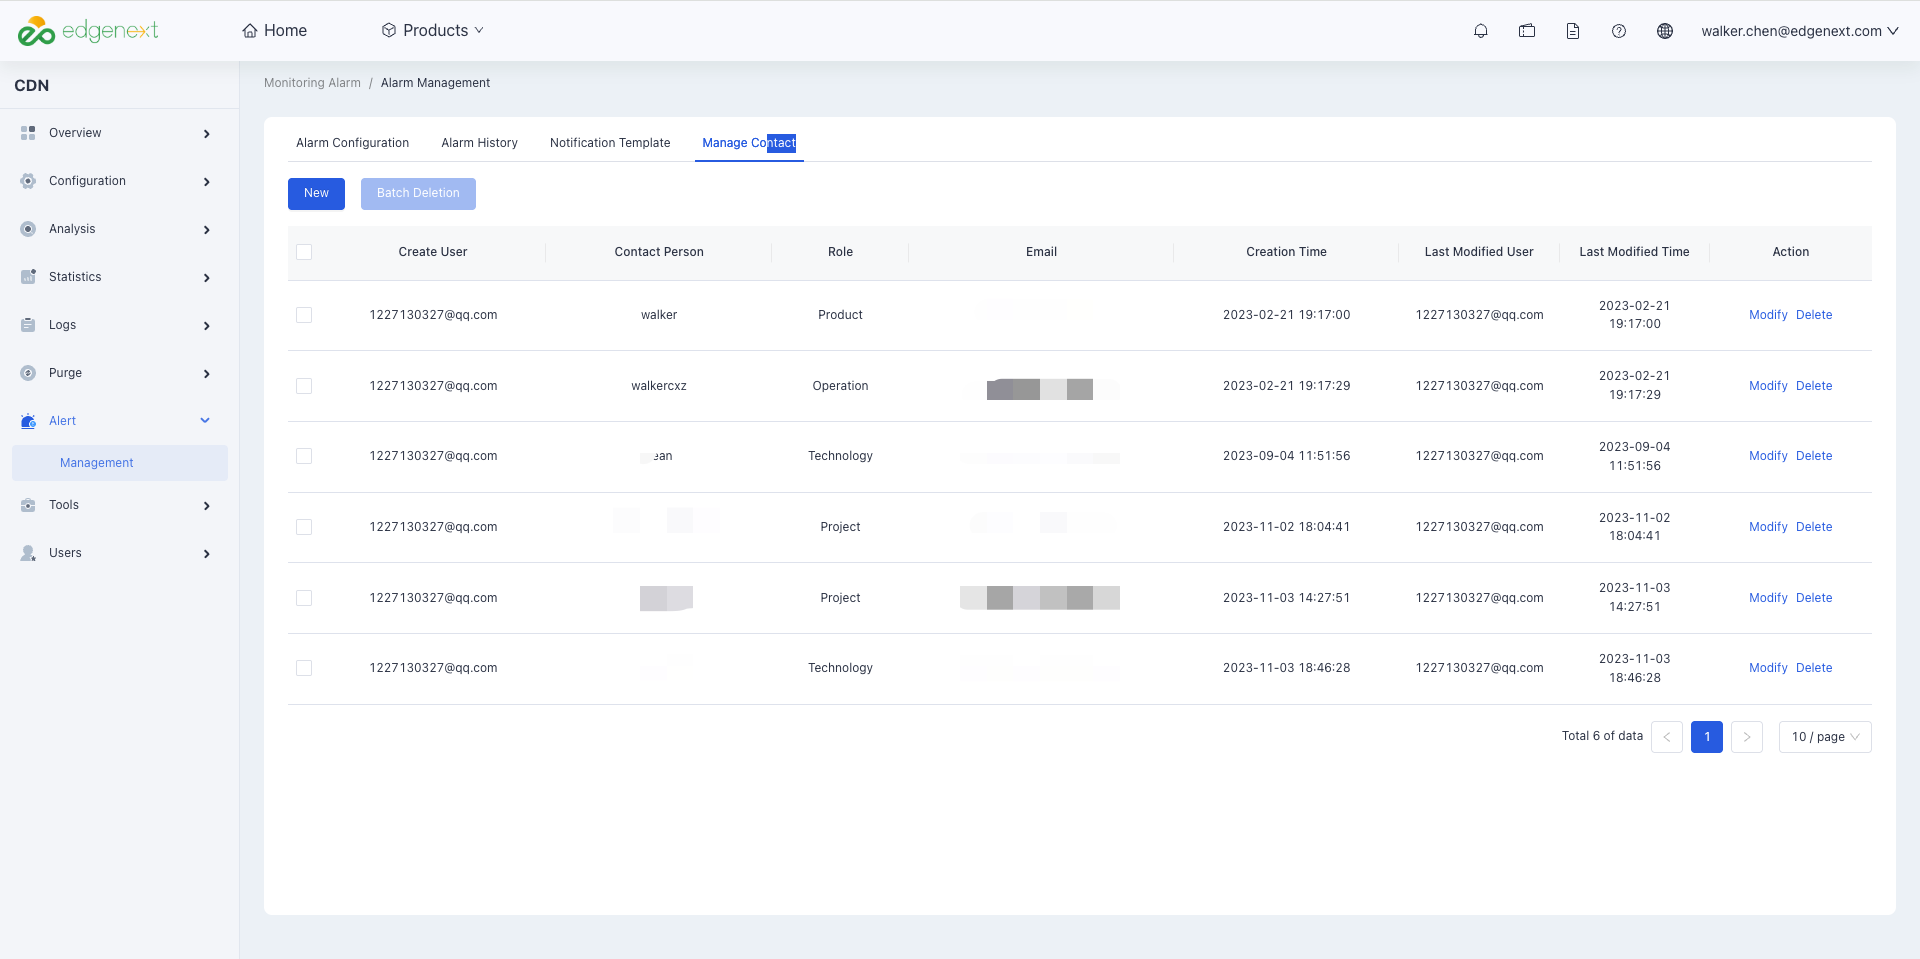
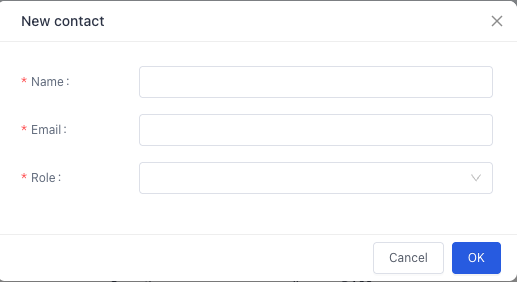
- Click the "New" button in the upper left corner to open the contact creation page, fill in the contact information as required, and click "Confirm" to complete the addition.
Need help? Contact our support team at support@edgenext.com.
Back to documentation home