

Visitor Authentication
Visitor Authentication enables client identity verification and access control via specified HTTP request headers. SCDN edge nodes judge access permissions based on configured header fields and values, implementing a non-intrusive, flexible, and lightweight visitor authentication mechanism.
Integration Guide
When initiating a request, the client must include the custom request header X-SCDN-Req-Token, whose value is the generated authentication token.
Upon receiving the request, the edge node validates the value of X-SCDN-Req-Token.
- If validation succeeds, the request is processed normally.
- If validation fails, the request is rejected and an HTTP 464 response is returned.
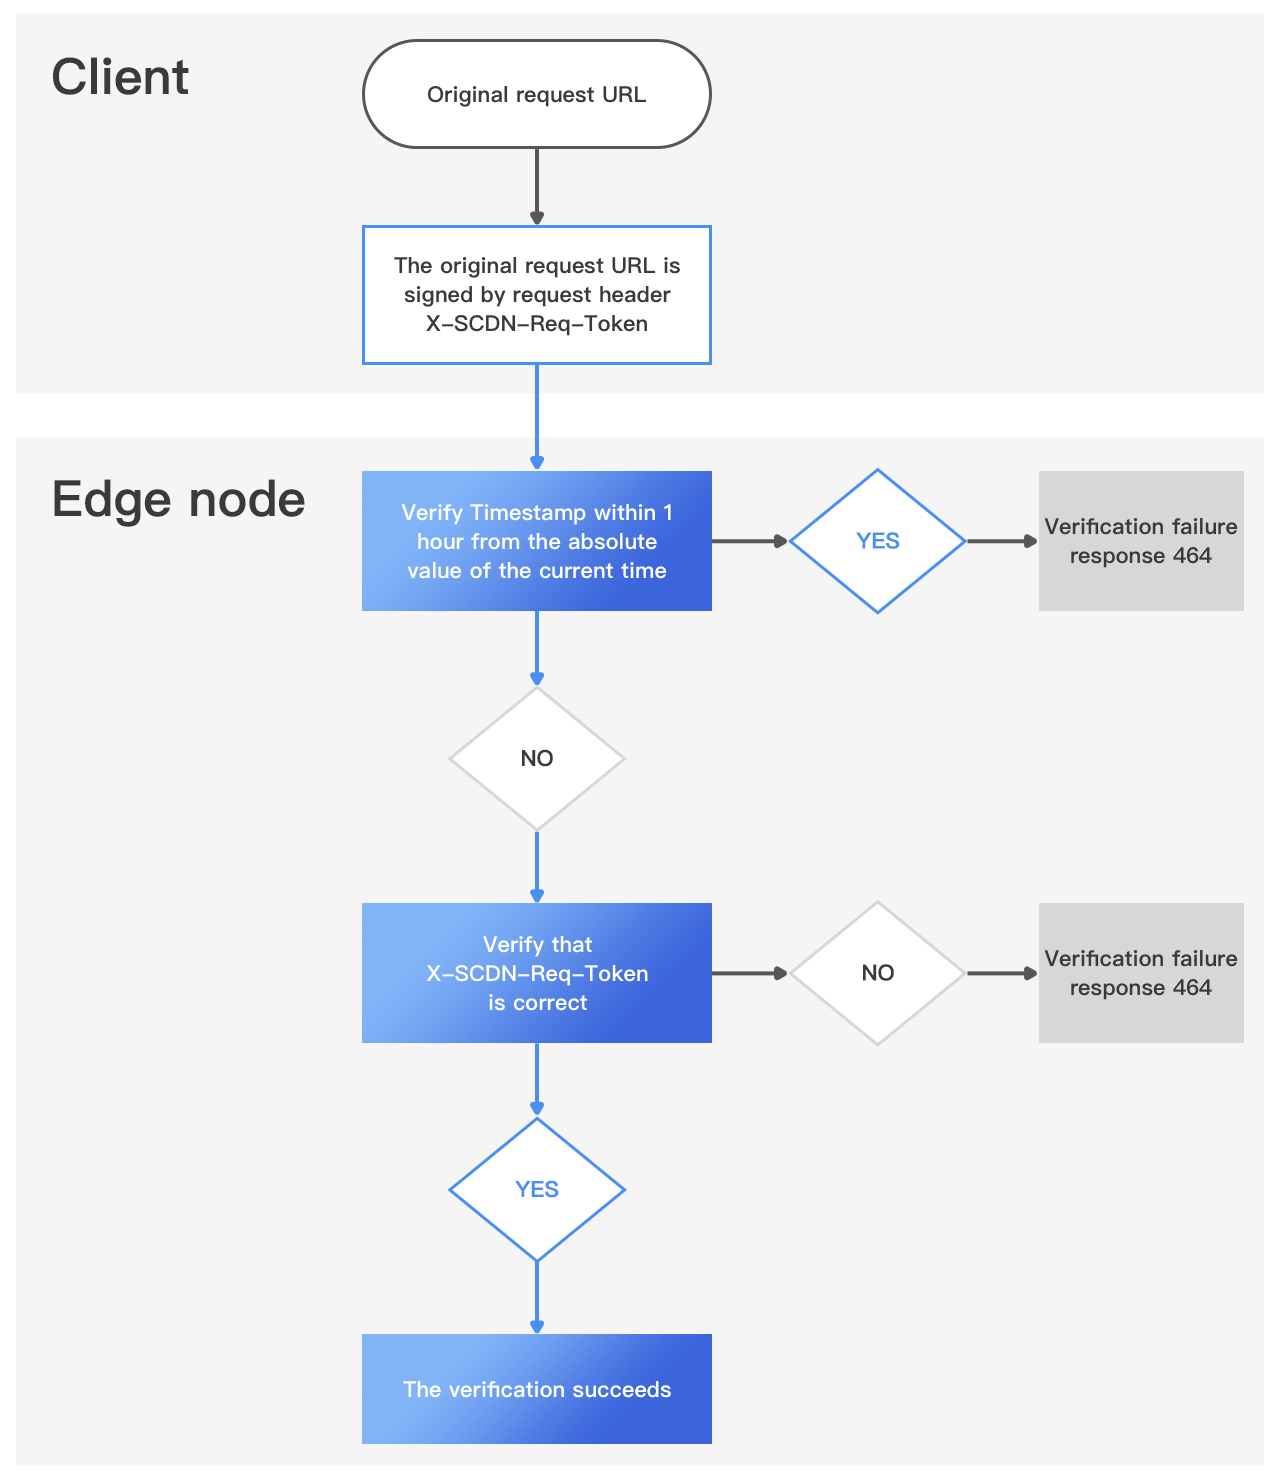
Authentication Algorithm
Field Description Example Timestamp Authentication expiration time in Unix timestamp (decimal). A clock skew of up to ±1 hour is allowed. 1581577282 NONCE A random string. A unique value is recommended for each request. Zod2Lhy2nLj8 AUTH_TOKEN Authentication secret automatically generated when Visitor Authentication is enabled. 1964c708b9f1231c96b3aa0db0d6772e URL The complete request URL, including query parameters. http://www.demo.com/token?auth=1
Concatenate Timestamp, NONCE, AUTH_TOKEN, and URL in the following order, and calculate the MD5 hash of the concatenated string. The resulting MD5 value must be in lowercase.
token = md5(Timestamp + NONCE + AUTH_TOKEN + URL)
Example:
token = md5(
1581577282
Zod2Lhy2nLj8
1964c708b9f1231c96b3aa0db0d6772e
http://www.demo.com/token?auth=1
)
Generated MD5:
fc7f02dc369206905f9a41a12297a783
Then concatenate Timestamp, NONCE, and MD5 using the pipe character (|) and assign the result to the X-SCDN-Req-Token request header.
Timestamp|NONCE|MD5
Example:
X-SCDN-Req-Token:
1581577282|Zod2Lhy2nLj8|fc7f02dc369206905f9a41a12297a783
- Sending an Authenticated Request
Include the X-SCDN-Req-Token request header when sending the request.
curl -v -o /dev/null
"http://www.demo.com/token?auth=1"
-H "X-SCDN-Req-Token: 1581577282|Zod2Lhy2nLj8|fc7f02dc369206905f9a41a12297a783"
WebSocket Notes
Visitor Authentication applies only to the WebSocket Upgrade HTTP request. Once the WebSocket connection has been successfully established, subsequent WebSocket data frames are not authenticated.
When calculating the authentication MD5 for a WebSocket request, the URL used in the calculation must use the HTTP or HTTPS scheme, not the WS or WSS scheme.
Specifically:
For a ws:// request, use the corresponding http:// URL when calculating the MD5.
For a wss:// request, use the corresponding https:// URL.For example, if the original WebSocket URL is:
wss://ws.example.com/?arg1=value1
the URL used for MD5 calculation should be:
https://ws.example.com/?arg1=value1
Example Description Incorrect MD5=md5(1581577282Zod2Lhy2nLj81964c708b9f1231c96b3aa0db0d6772ewss://ws.example.com/?arg1=value1) Correct MD5=md5(1581577282Zod2Lhy2nLj81964c708b9f1231c96b3aa0db0d6772ehttps://ws.example.com/?arg1=value1)
Notes
- The client must support custom HTTP request headers to use this feature. Before integration, verify that your client application can send the X-SCDN-Req-Token header. Native browser WebSocket APIs do not support custom request headers.
- Once Visitor Authentication is enabled, all requests to the protected domain must pass authentication. Requests that fail authentication will be rejected. Thorough integration testing is strongly recommended before enabling this feature in production.
- Visitor Authentication is recommended for API and mobile application (App) scenarios.
Configuration Guide
Log in to the Security CDN Console.
In the left navigation pane, go to Security > Web Security.
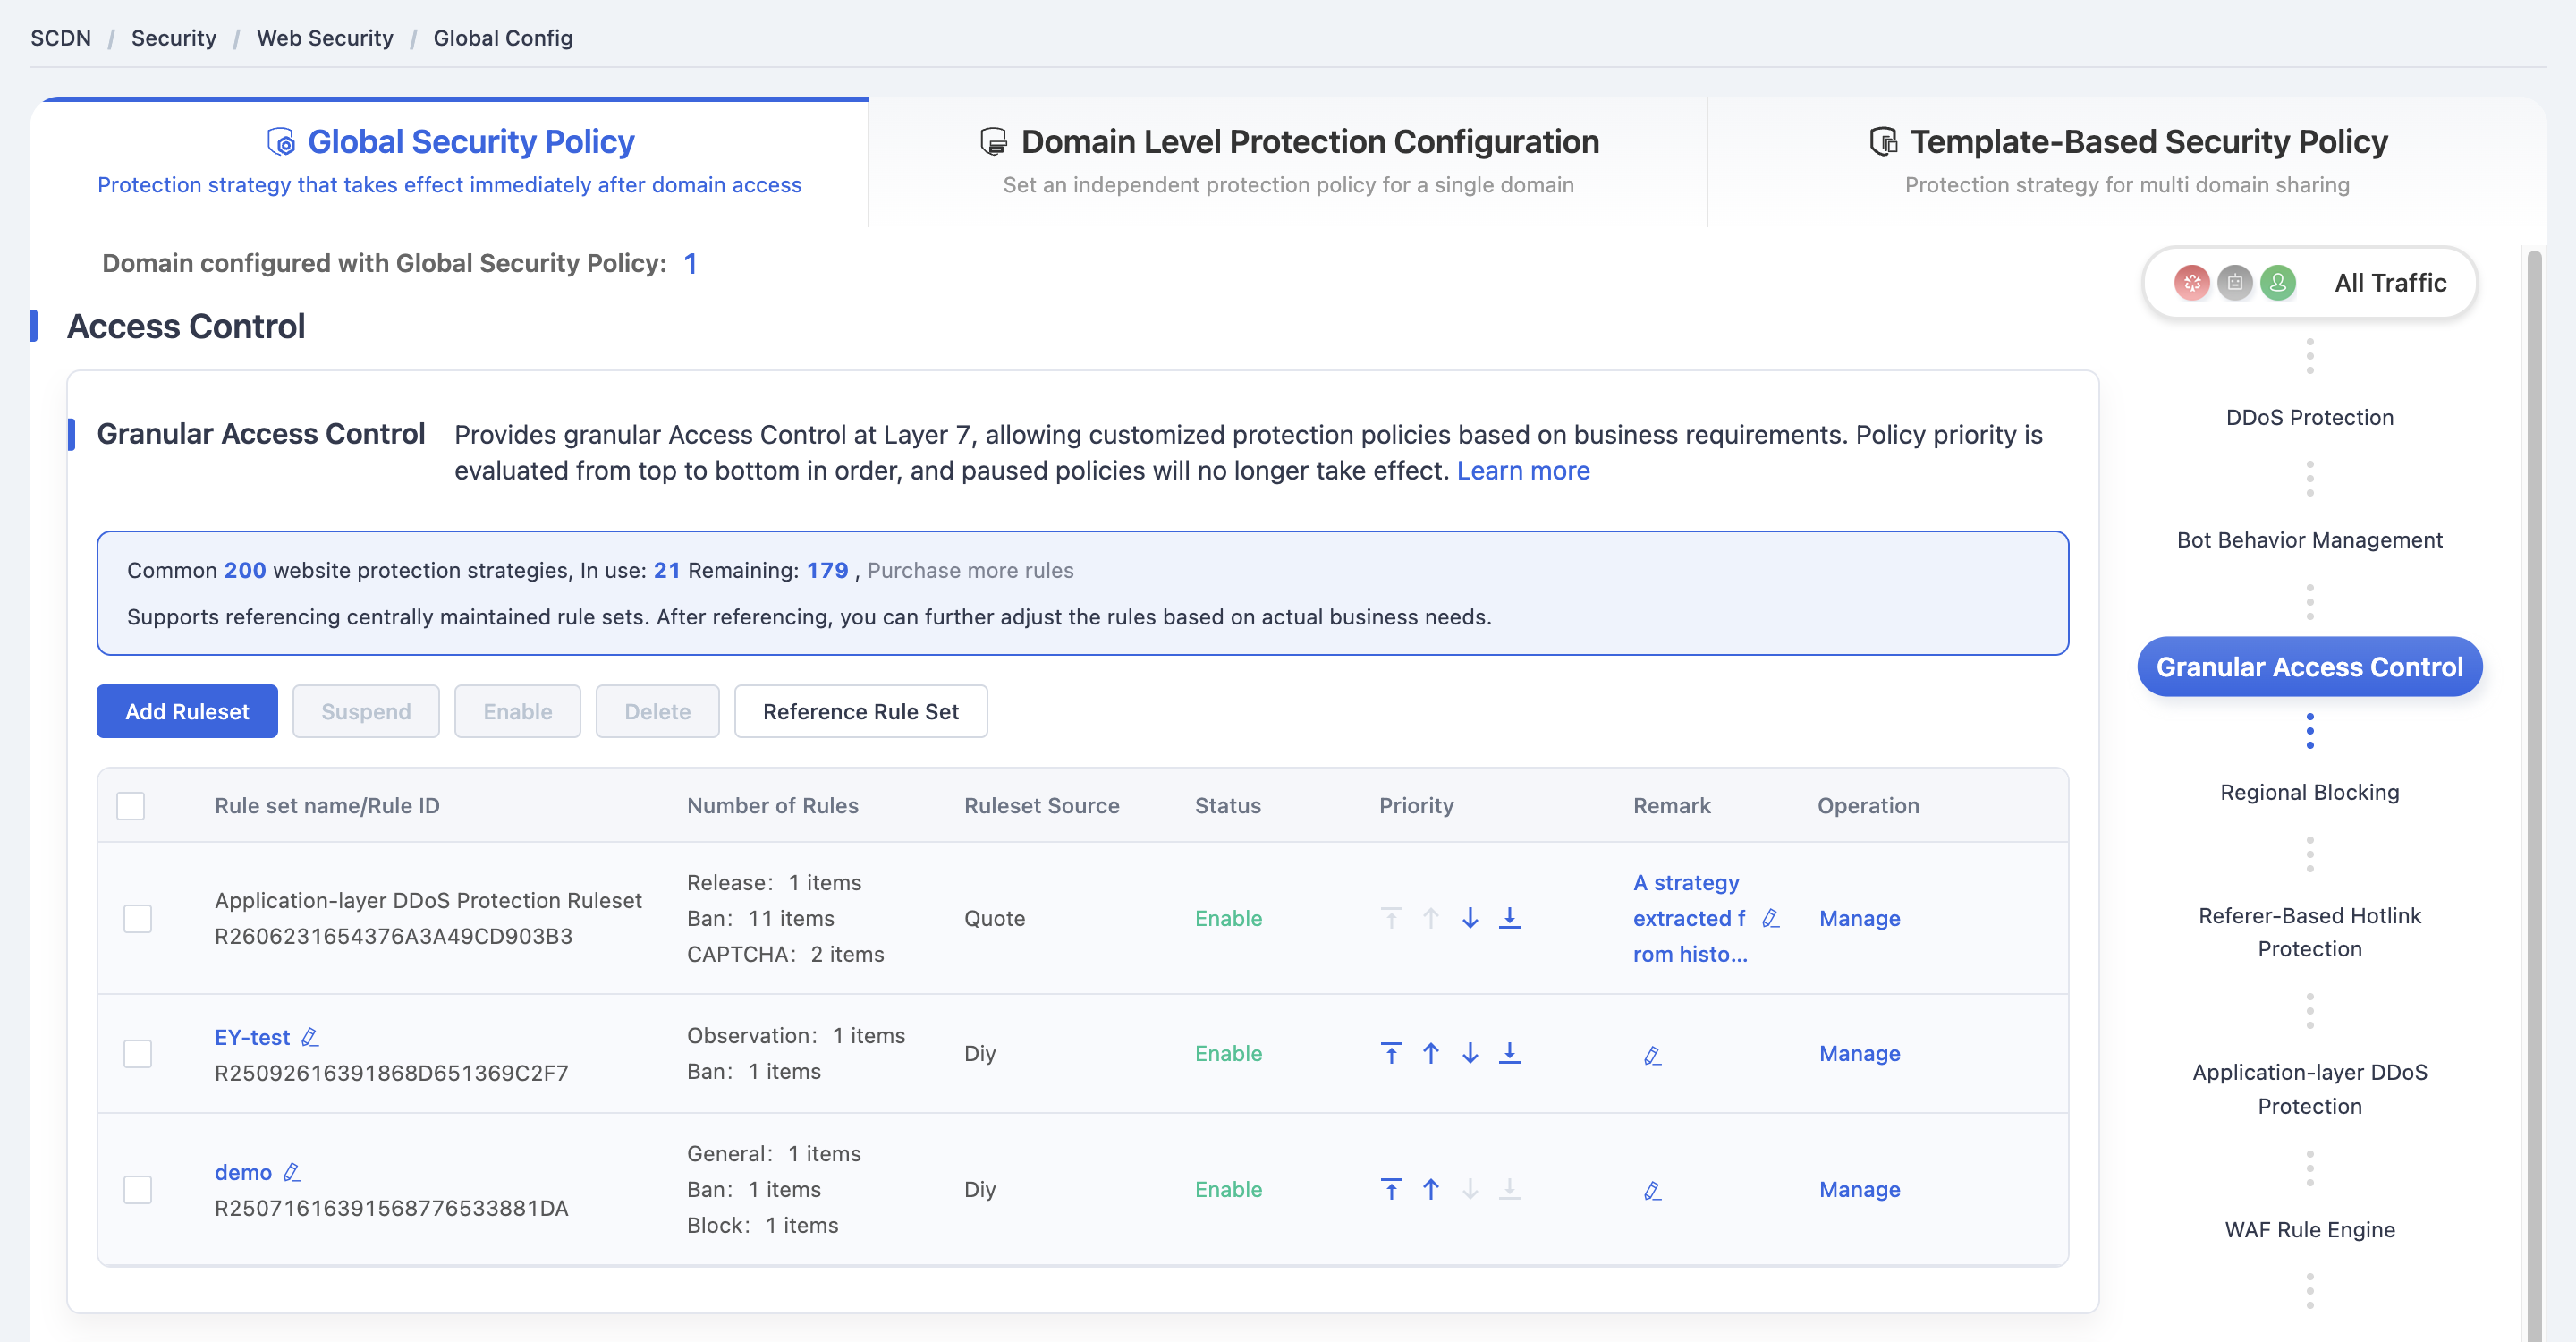
Switch to either the Domain-level Security Policy or the Template-Based Security Policy tab.
Click Policy Management to enter the corresponding configuration page.
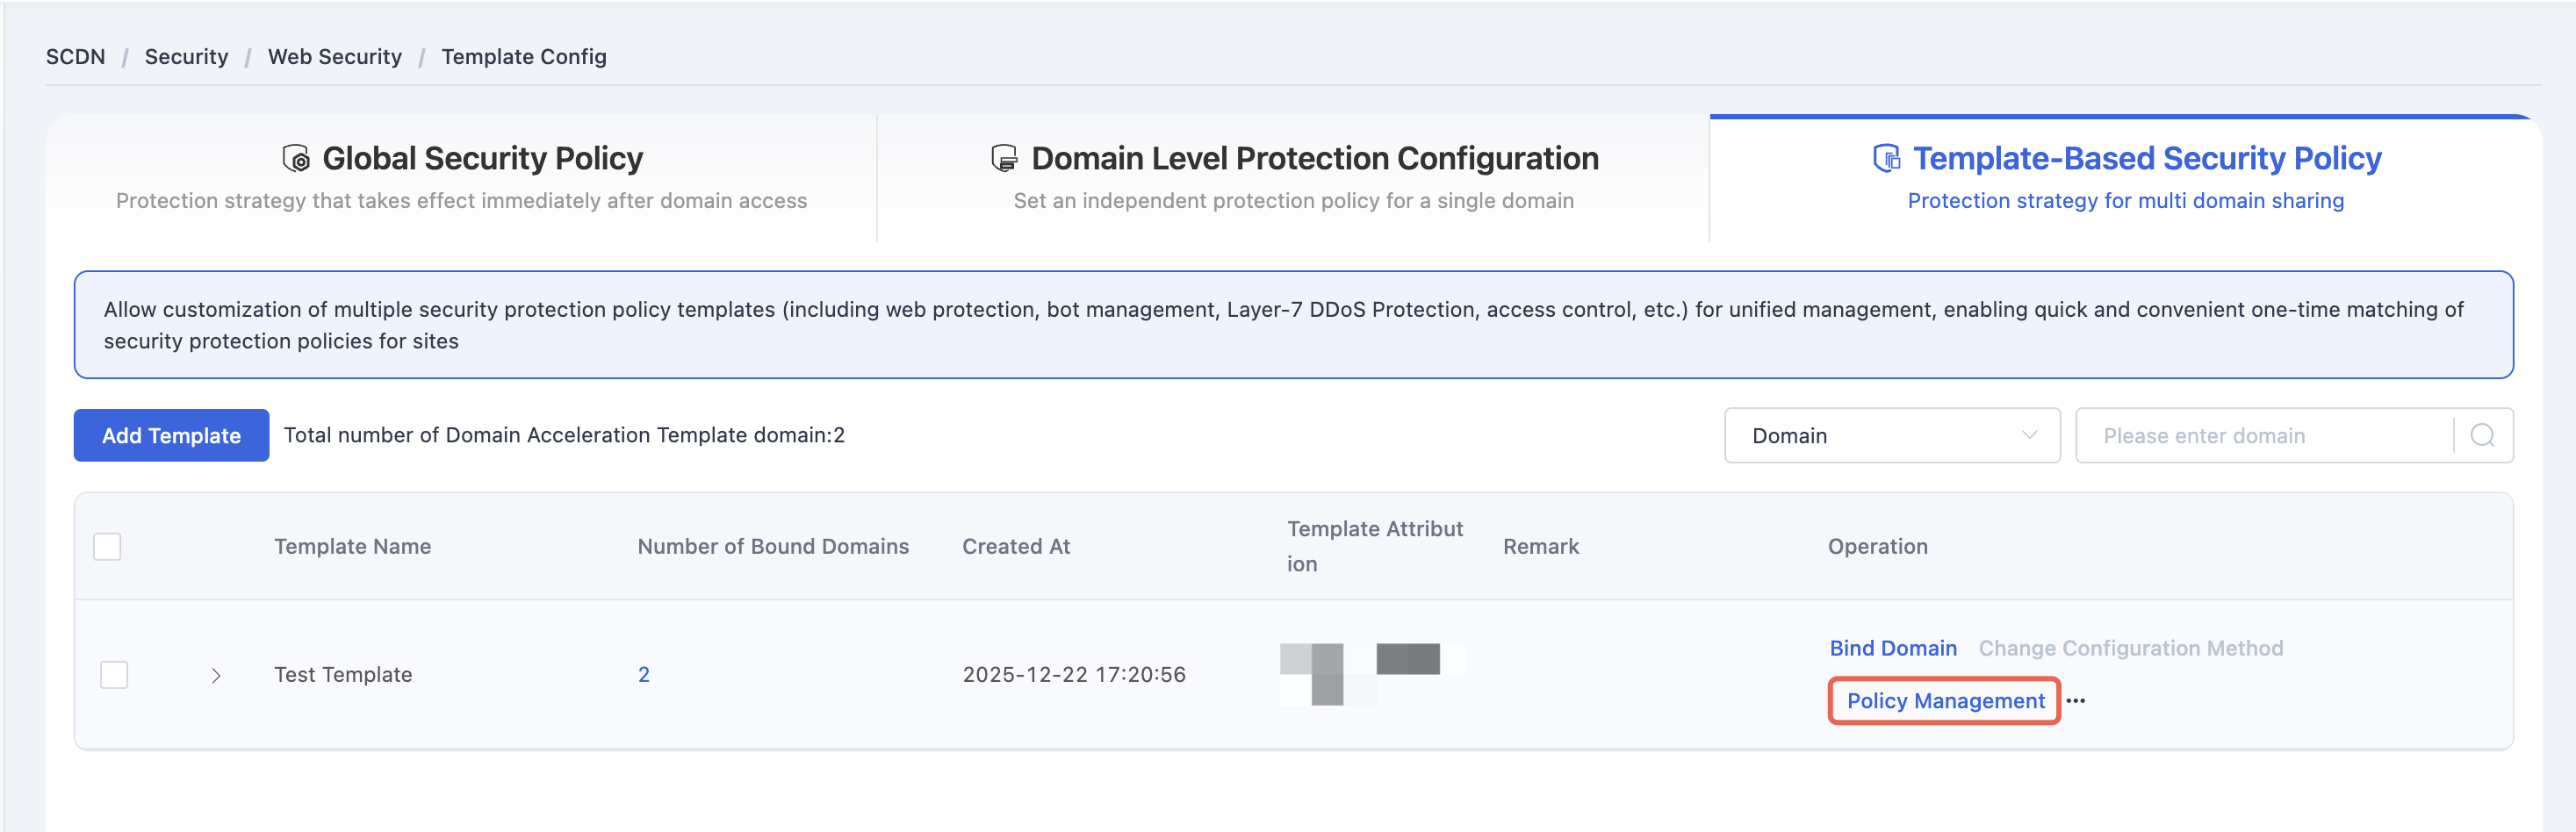
Scroll down to DDoS Protection > Visitor Authentication module.
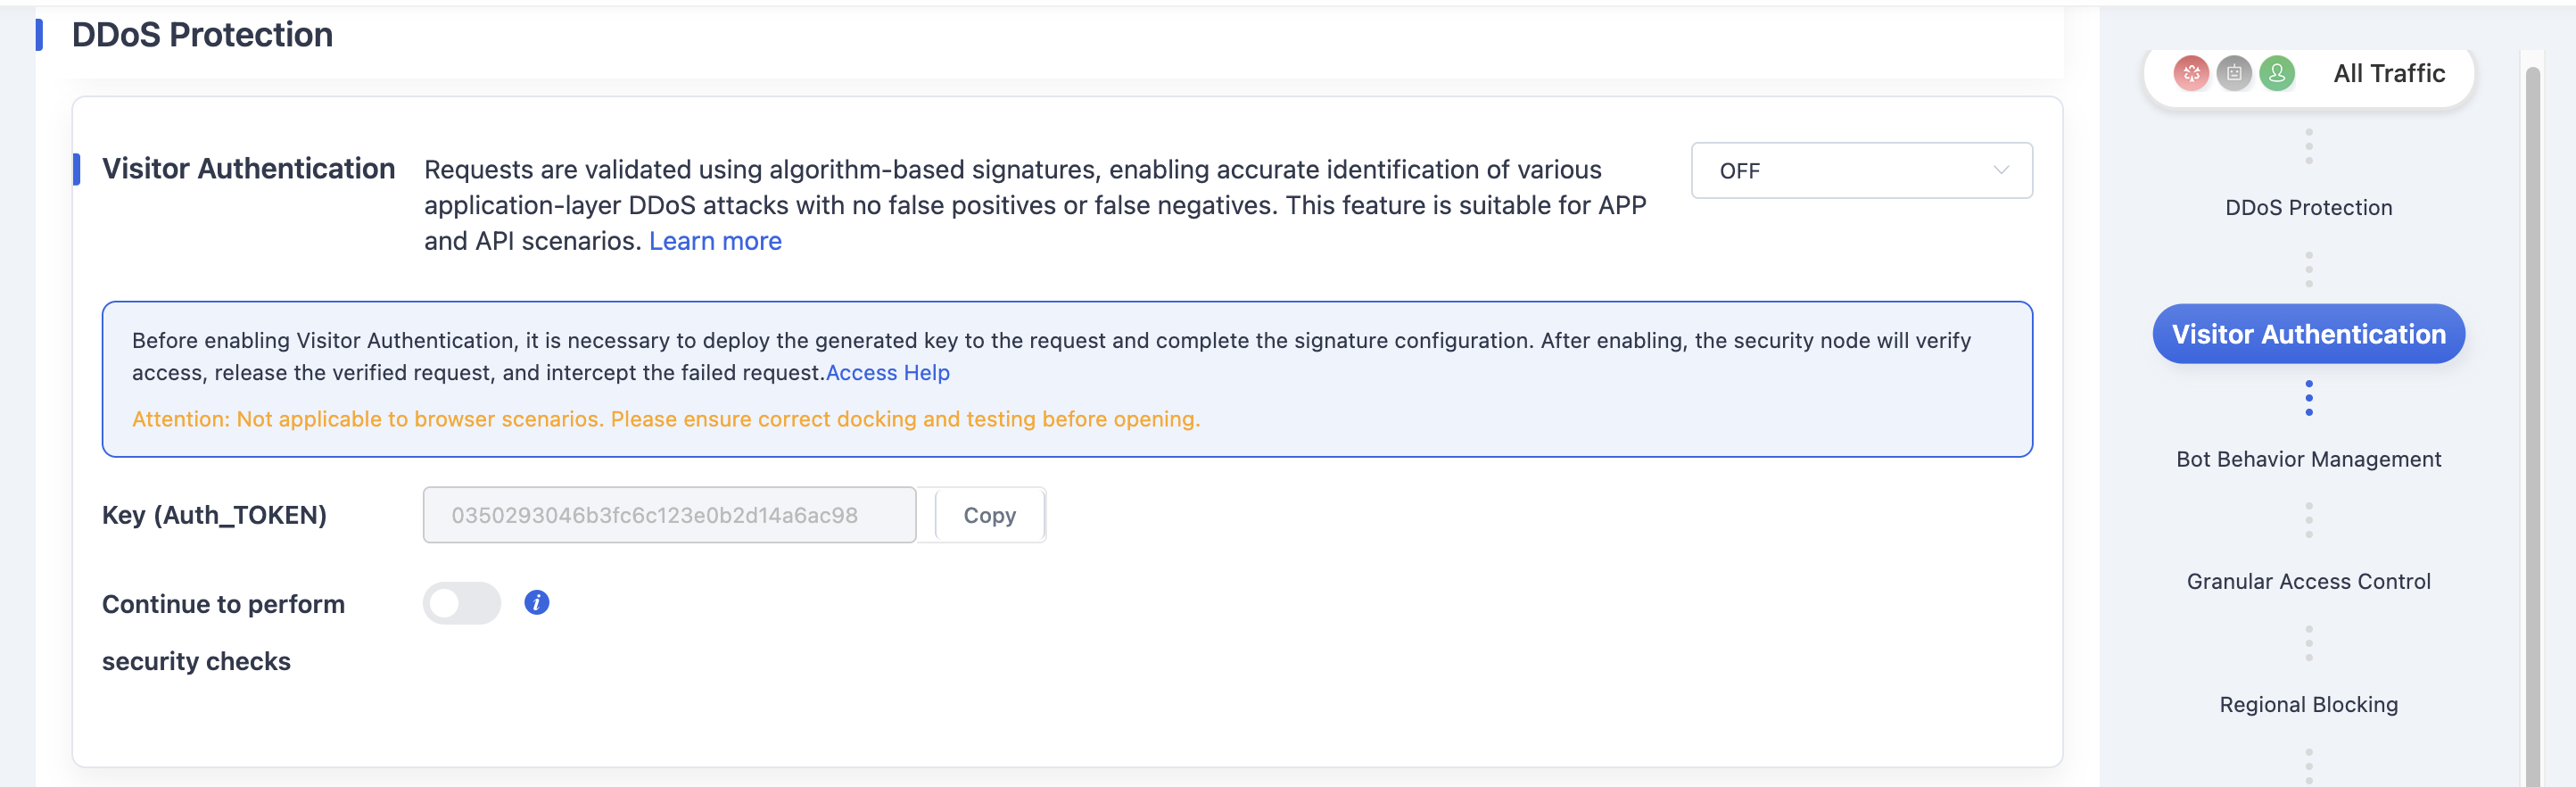
In the top-right dropdown menu, select ON/OFF. The feature is OFF by default.
Click Access Help to open a step-by-step integration and debugging panel.
- If the programmatically generated token matches the one from the tool, integration is successful.
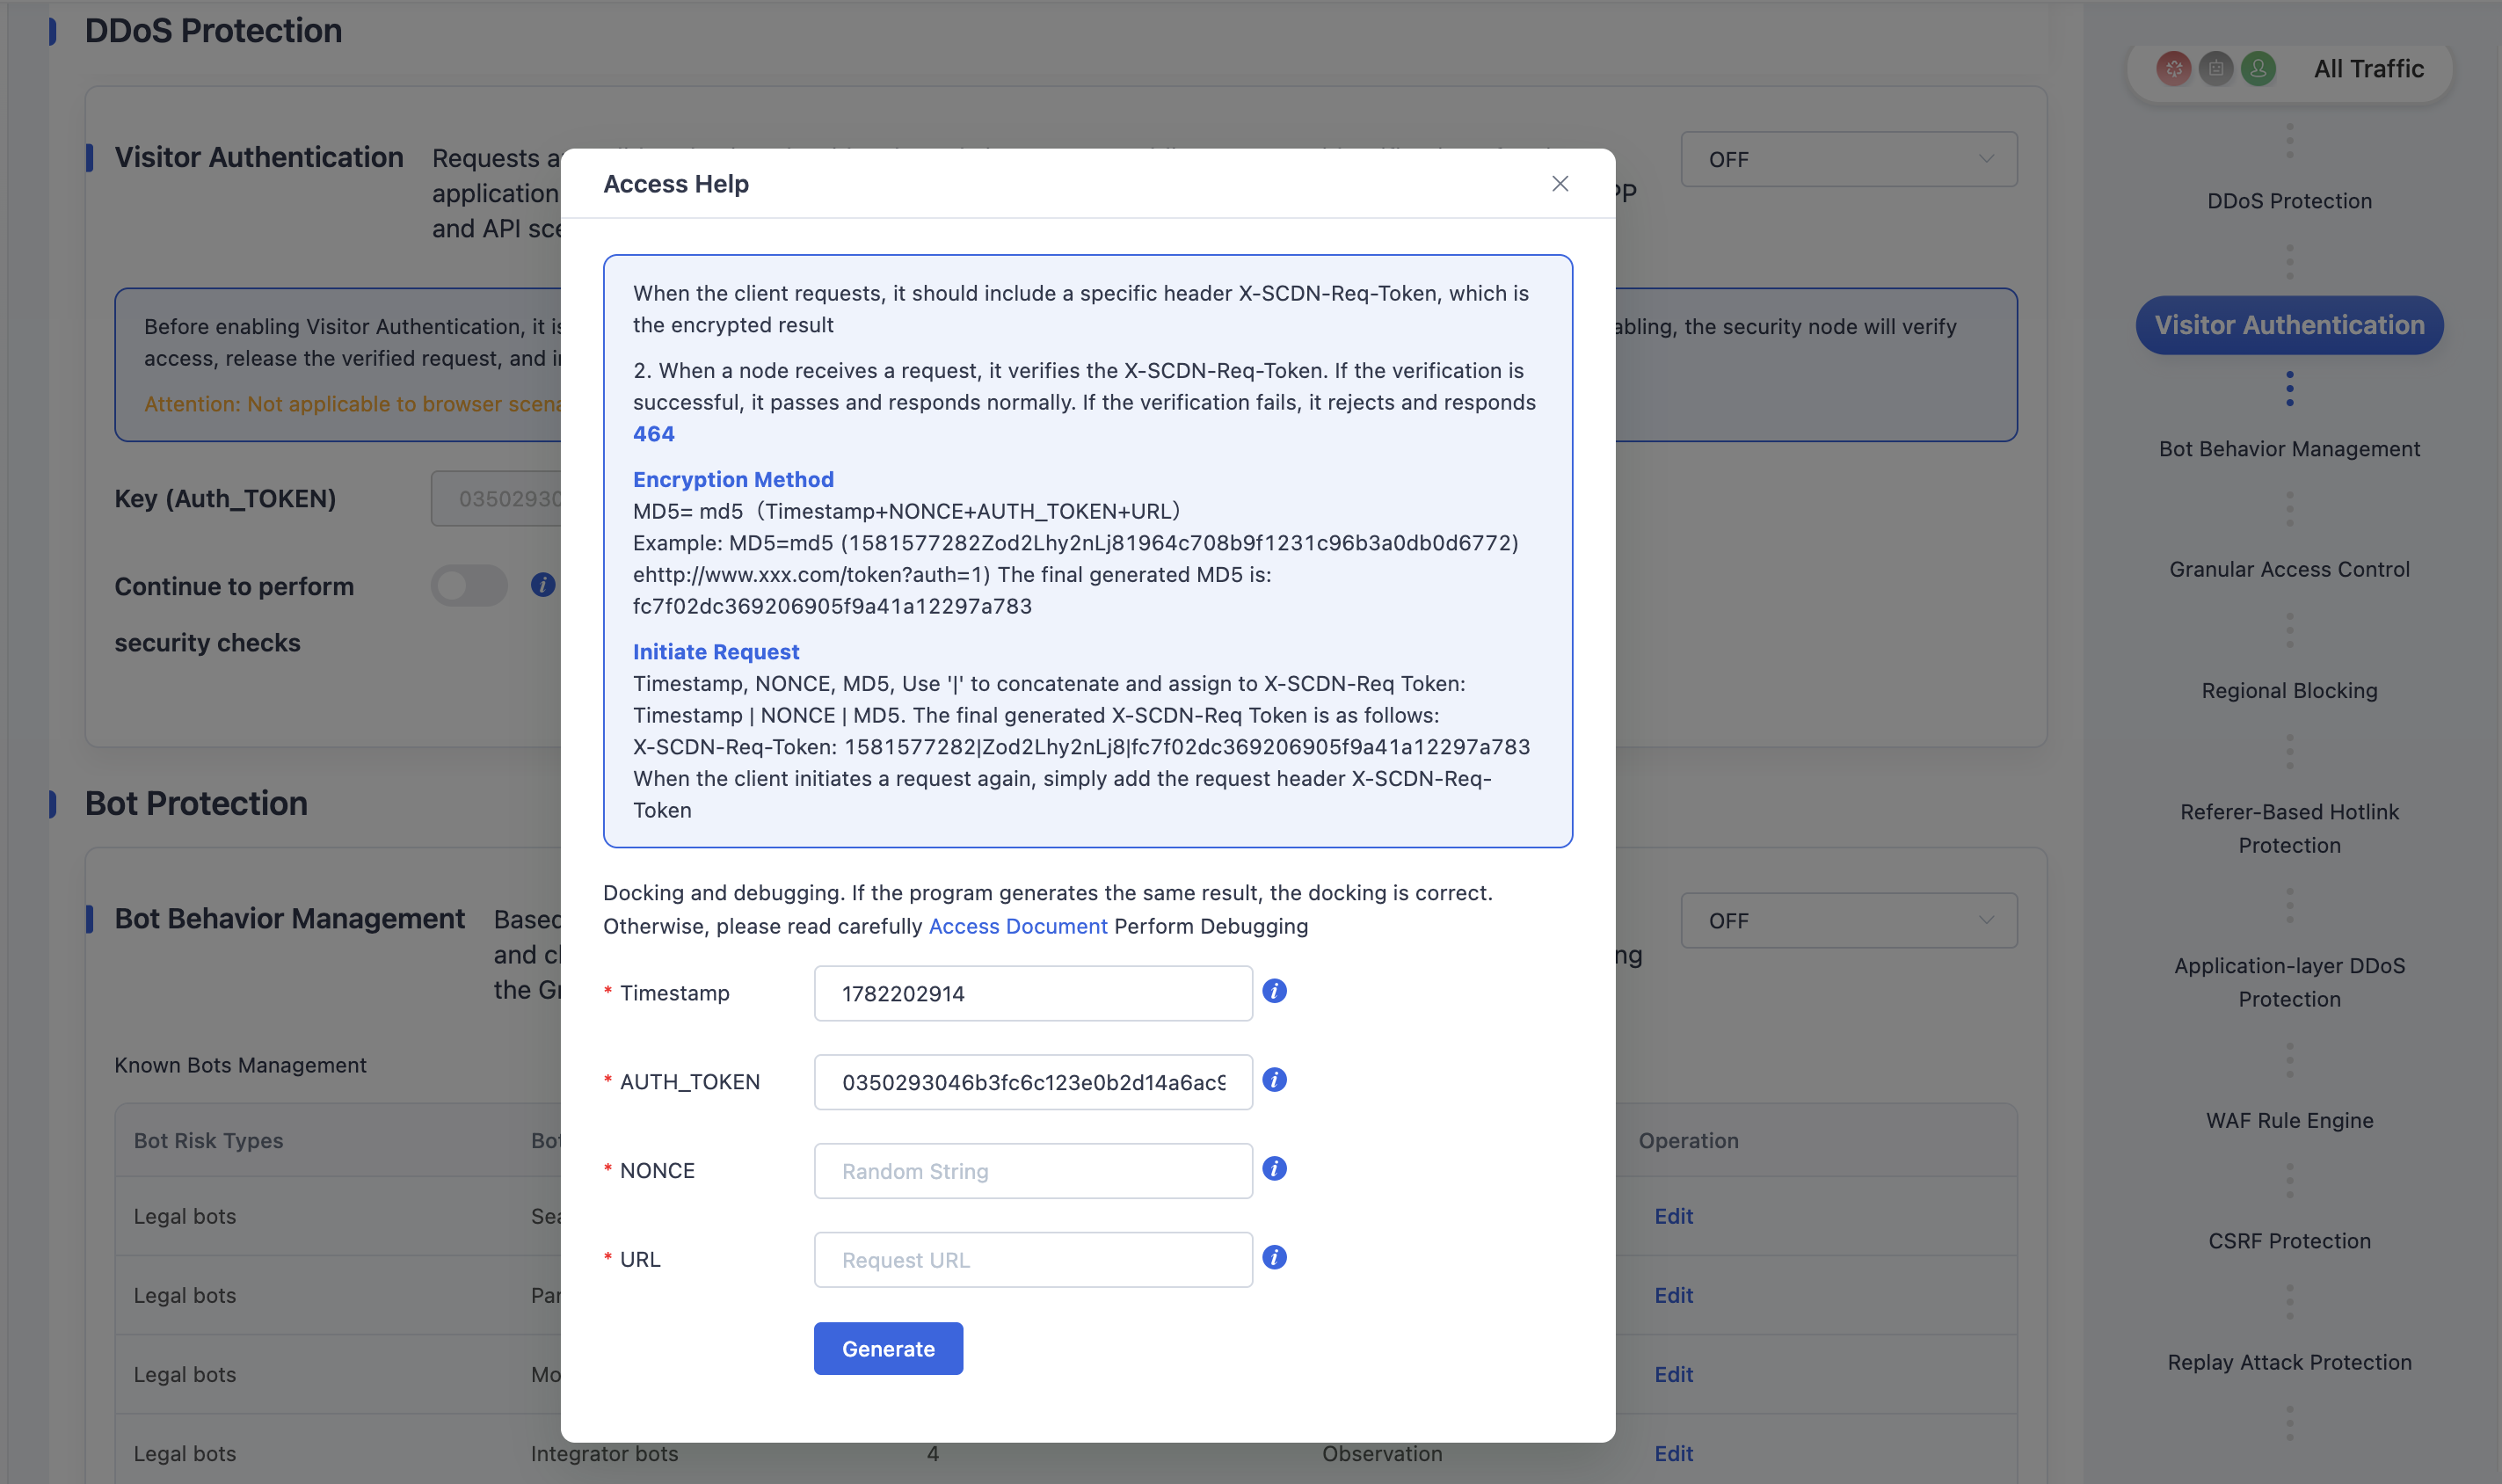
If you want further security inspection after authentication, enable "Continue the perform security checks".
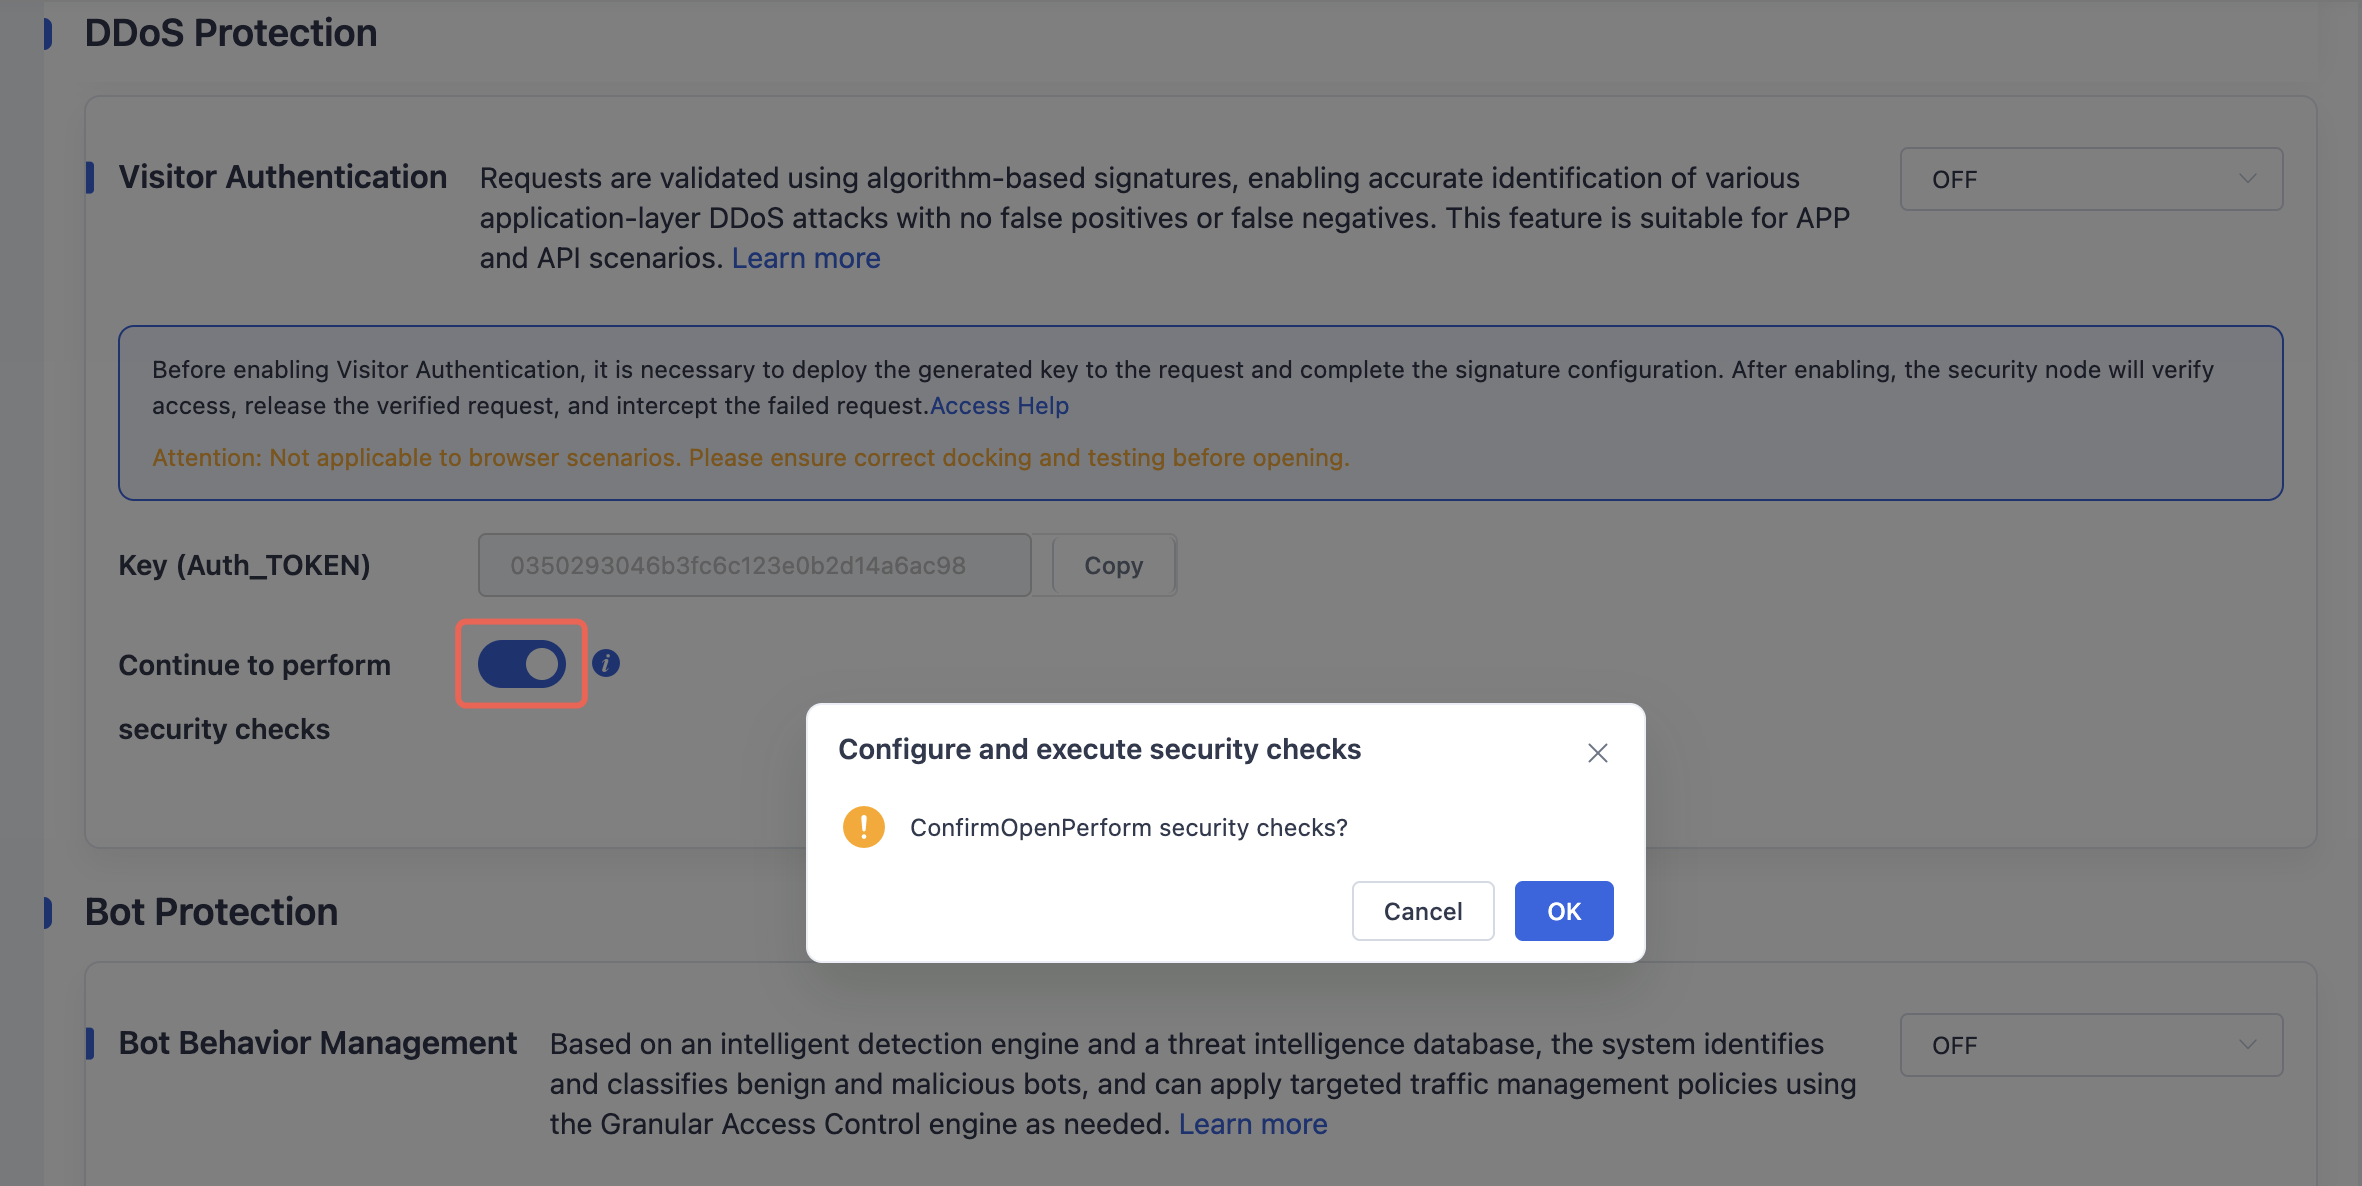
Click OK to apply the configuration to the Global Security Policy.
Need help? Contact our support team at support@edgenext.com.
Back to documentation home