

Object Storage Service Operation Guide
Object Storage Service Operation Guide
Create Bucket
Log in to the console. In the "Product" section, click the "OSS" tab under "Storage Services" to access the "Object Storage Service" interface.

In the left navigation bar, click "Storage Bucket" to access the bucket management interface. This interface displays all bucket information for a user within a specific availability zone in a list format. Users can switch the resource region for buckets using the region dropdown menu in the top-left corner of the list. To create a new bucket, click the "Create" button in the top-right corner of the list to navigate to the bucket creation page and generate a bucket within the current region.
In the bucket creation pop-up window, configure the bucket's "Name" and "Permission" settings. Carefully read and agree to the "Service Agreement," then click "OK" to create the bucket. Upon successful creation, the newly created bucket information will automatically appear in the bucket list page.
! The bucket "Name" must be unique within the region where the object storage service operates. When "Permission" is set to "Private," AK/SK authentication must be provided when accessing object storage resources via the OSS API.
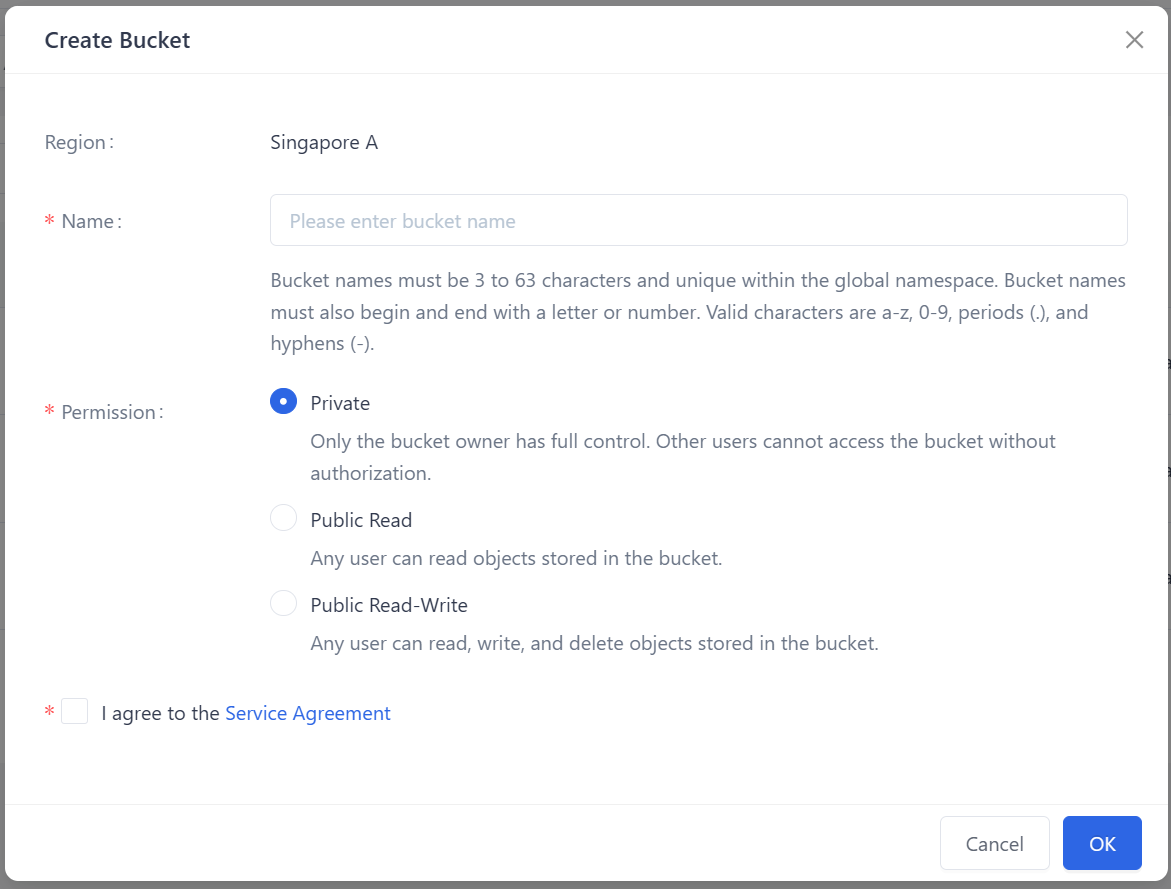
- Alternatively, you can create buckets by accessing the OSS API. For detailed instructions, please refer to the "EdgeNext OSS API User Guide".
Upload File to Bucket
On the bucket list page, click the "Name" of the bucket where you want to upload files to access its details page.
Depending on your requirements, you can organize the file structure within the bucket by clicking "Create Folder", or proceed directly to file upload by clicking "Upload".
On the file upload page, you can click "Add File" to select individual files for upload, or click "Add Folder" to collectively select all files within a local folder. After selecting the desired files, click "Upload" to initiate the upload to object storage.
! When uploading files via the web interface, please do not close the file upload page until the progress is complete to avoid interrupting network transmission.Alternatively, you can upload files by accessing the OSS API. For detailed instructions, please refer to the "EdgeNext OSS API User Guide".
Accessing Files
For buckets with "Public Read" or "Public Read-Write" permission, the file within them can be downloaded directly by clicking the "Download" button on the bucket's object list page. Alternatively, you can click "Copy URL" and access the corresponding URL directly in a browser to initiate the download.
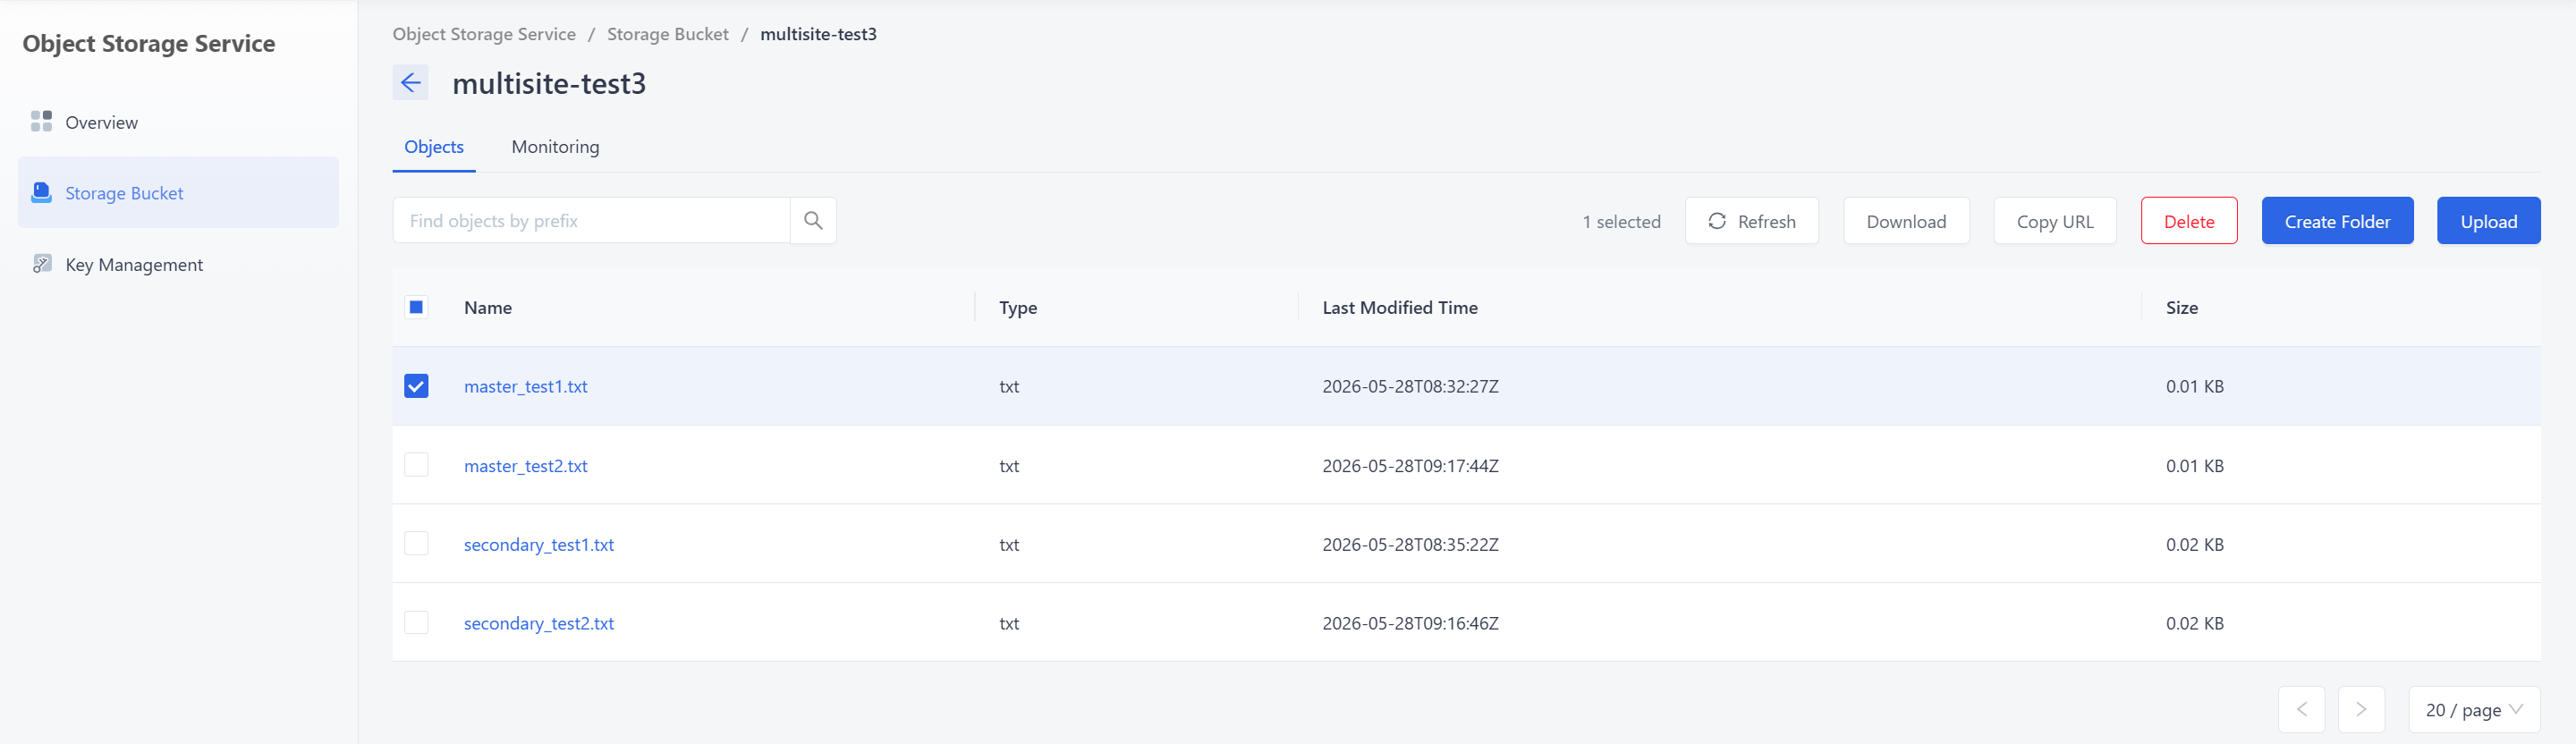
For buckets with "Private" permission, the files within them can be downloaded directly by clicking the "Download" button on the bucket's object list page. Alternatively, you can download files by accessing the OSS API. For detailed instructions, please refer to the "EdgeNext OSS API User Guide".
Remove File from Bucket
On the bucket's object list page, select the files or folders to be deleted by checking the corresponding checkboxes. Then, click the "Delete" button located in the top-right corner of the list. In the confirmation dialog that appears, click "Confirm" to confirm the deletion.
Alternatively, you can delete files or folders by accessing the OSS API. For detailed instructions, please refer to the "EdgeNext OSS API User Guide".
! The deleting action is irreversible. Deleting files or folders will render them inaccessible to external services and operations. Proceed with caution.
Delete Bucket
On the bucket list page, click the "Delete" button corresponding to the bucket you wish to remove. In the confirmation dialog that appears, enter the confirmation password and click "Confirm" to proceed with the deletion.
Alternatively, you can delete a bucket by calling the OSS API. For detailed instructions, please refer to the "EdgeNext OSS API User Guide".
! The deletion action is irreversible. Deleting a bucket will delete all the files in this bucket. Proceed with caution.
Create AK/SK
In the left navigation bar, click "Key Management" to access the AK/SK management interface. This interface displays all AK/SK pairs belonging to the user within a specific availability zone in a list format. Users can switch the resource region for the AK/SK pairs using the region dropdown menu in the top-left corner of the list. To create new credentials, click the "Create Key" button in the top-right corner of the list to navigate to the AK/SK creation page and generate a pair within the current region.
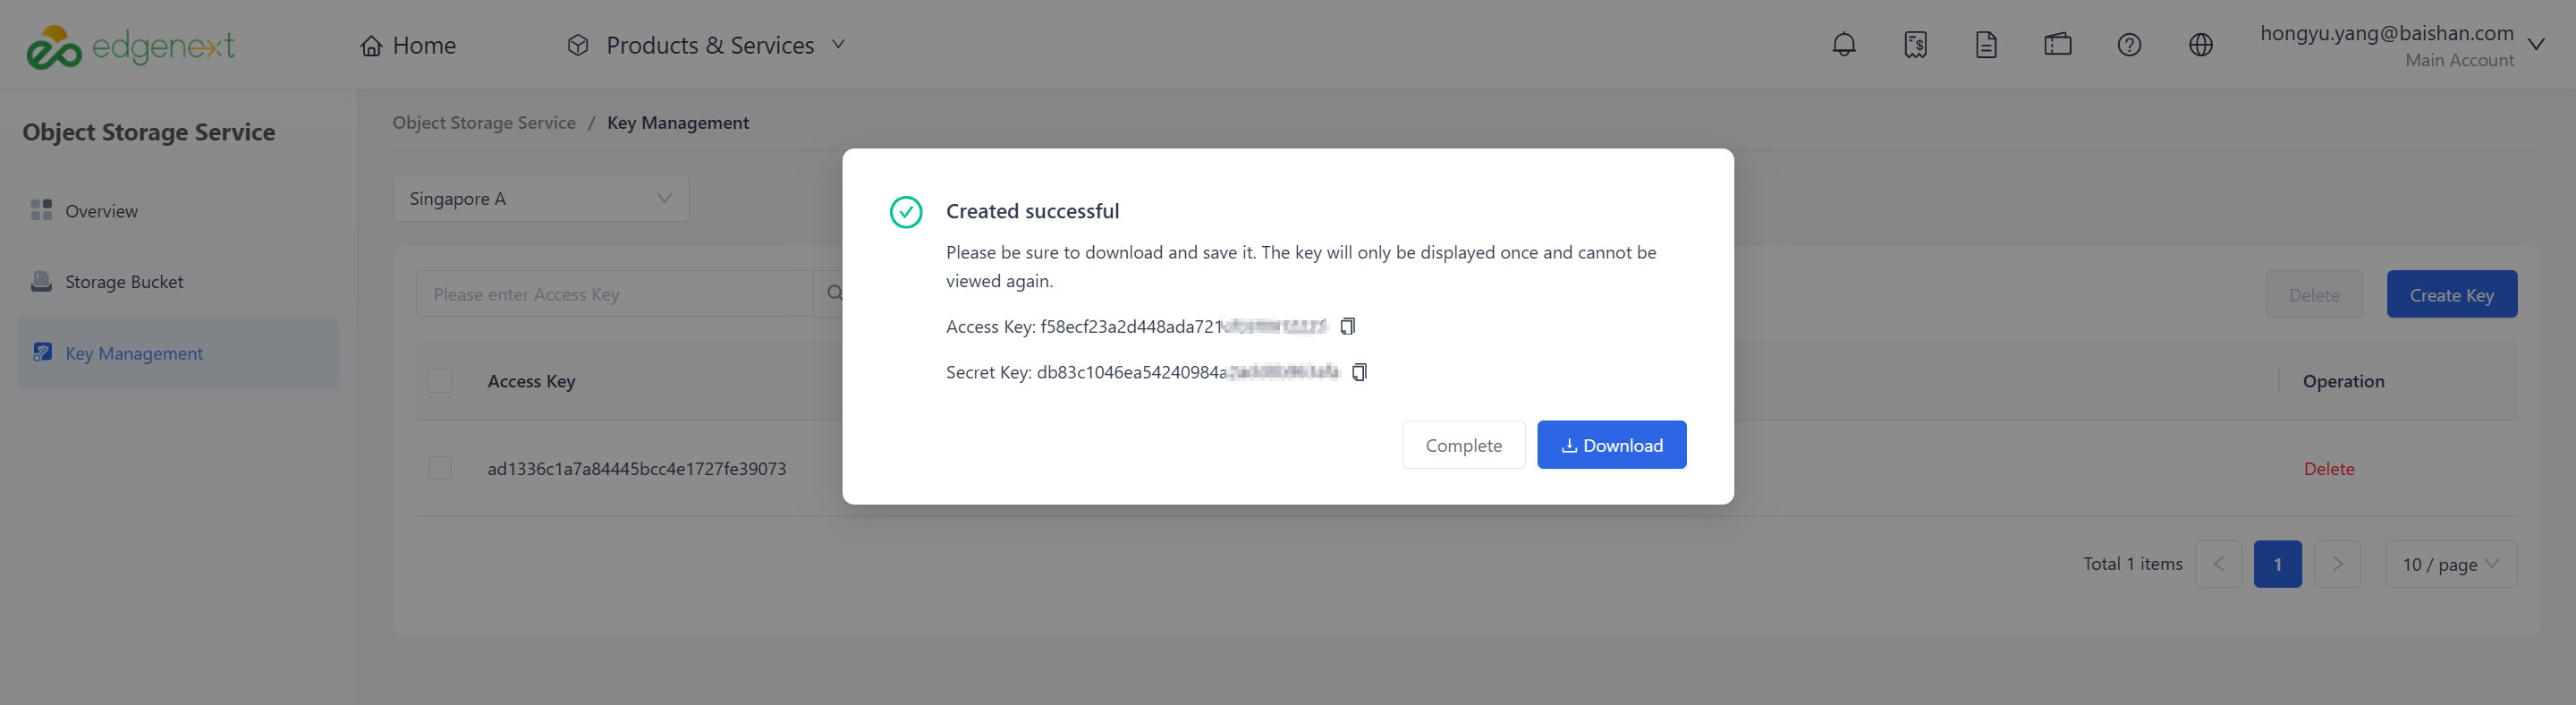
In the pop-up confirmation dialog for creating an AK/SK, click "Confirm", and the system will automatically generate a new AK/SK pair. Users can click the "Download" button to save the AK/SK credentials as a file locally. Alternatively, they can click the copy button next to the AK/SK to save the information.
! Securely store your AK/SK information. Avoid any leakage of the AK/SK to prevent data security risks to your object storage.
Delete AK/SK
On the AK/SK list page, click the "Delete" button to the right of the AK/SK pair you wish to remove. In the confirmation dialog that appears, verify the information and click "Confirm" to proceed with the deletion.
Alternatively, you can select multiple AK/SK pairs by checking the checkboxes to the left of each entry, and then click the "Delete" button at the top of the list to perform a batch deletion.
! The deletion action is irreversible. Deleting an AK/SK pair will render any business operations relying on that credential to access object storage invalid. Proceed with caution.
Need help? Contact our support team at support@edgenext.com.
Back to documentation home