

Domain Integration
Integrating your custom domain with Security CDN enables acceleration, caching, and security protection capabilities. After successful addition, the system will generate associated policies and DNS resolution information. Follow the guided steps to complete the integration process.
Add Domain
Log in to the Security CDN Console.
In the left navigation panel, go to Domain Management and click Domain List to access the domain page.
Click the Add Domain button to begin the domain addition process.
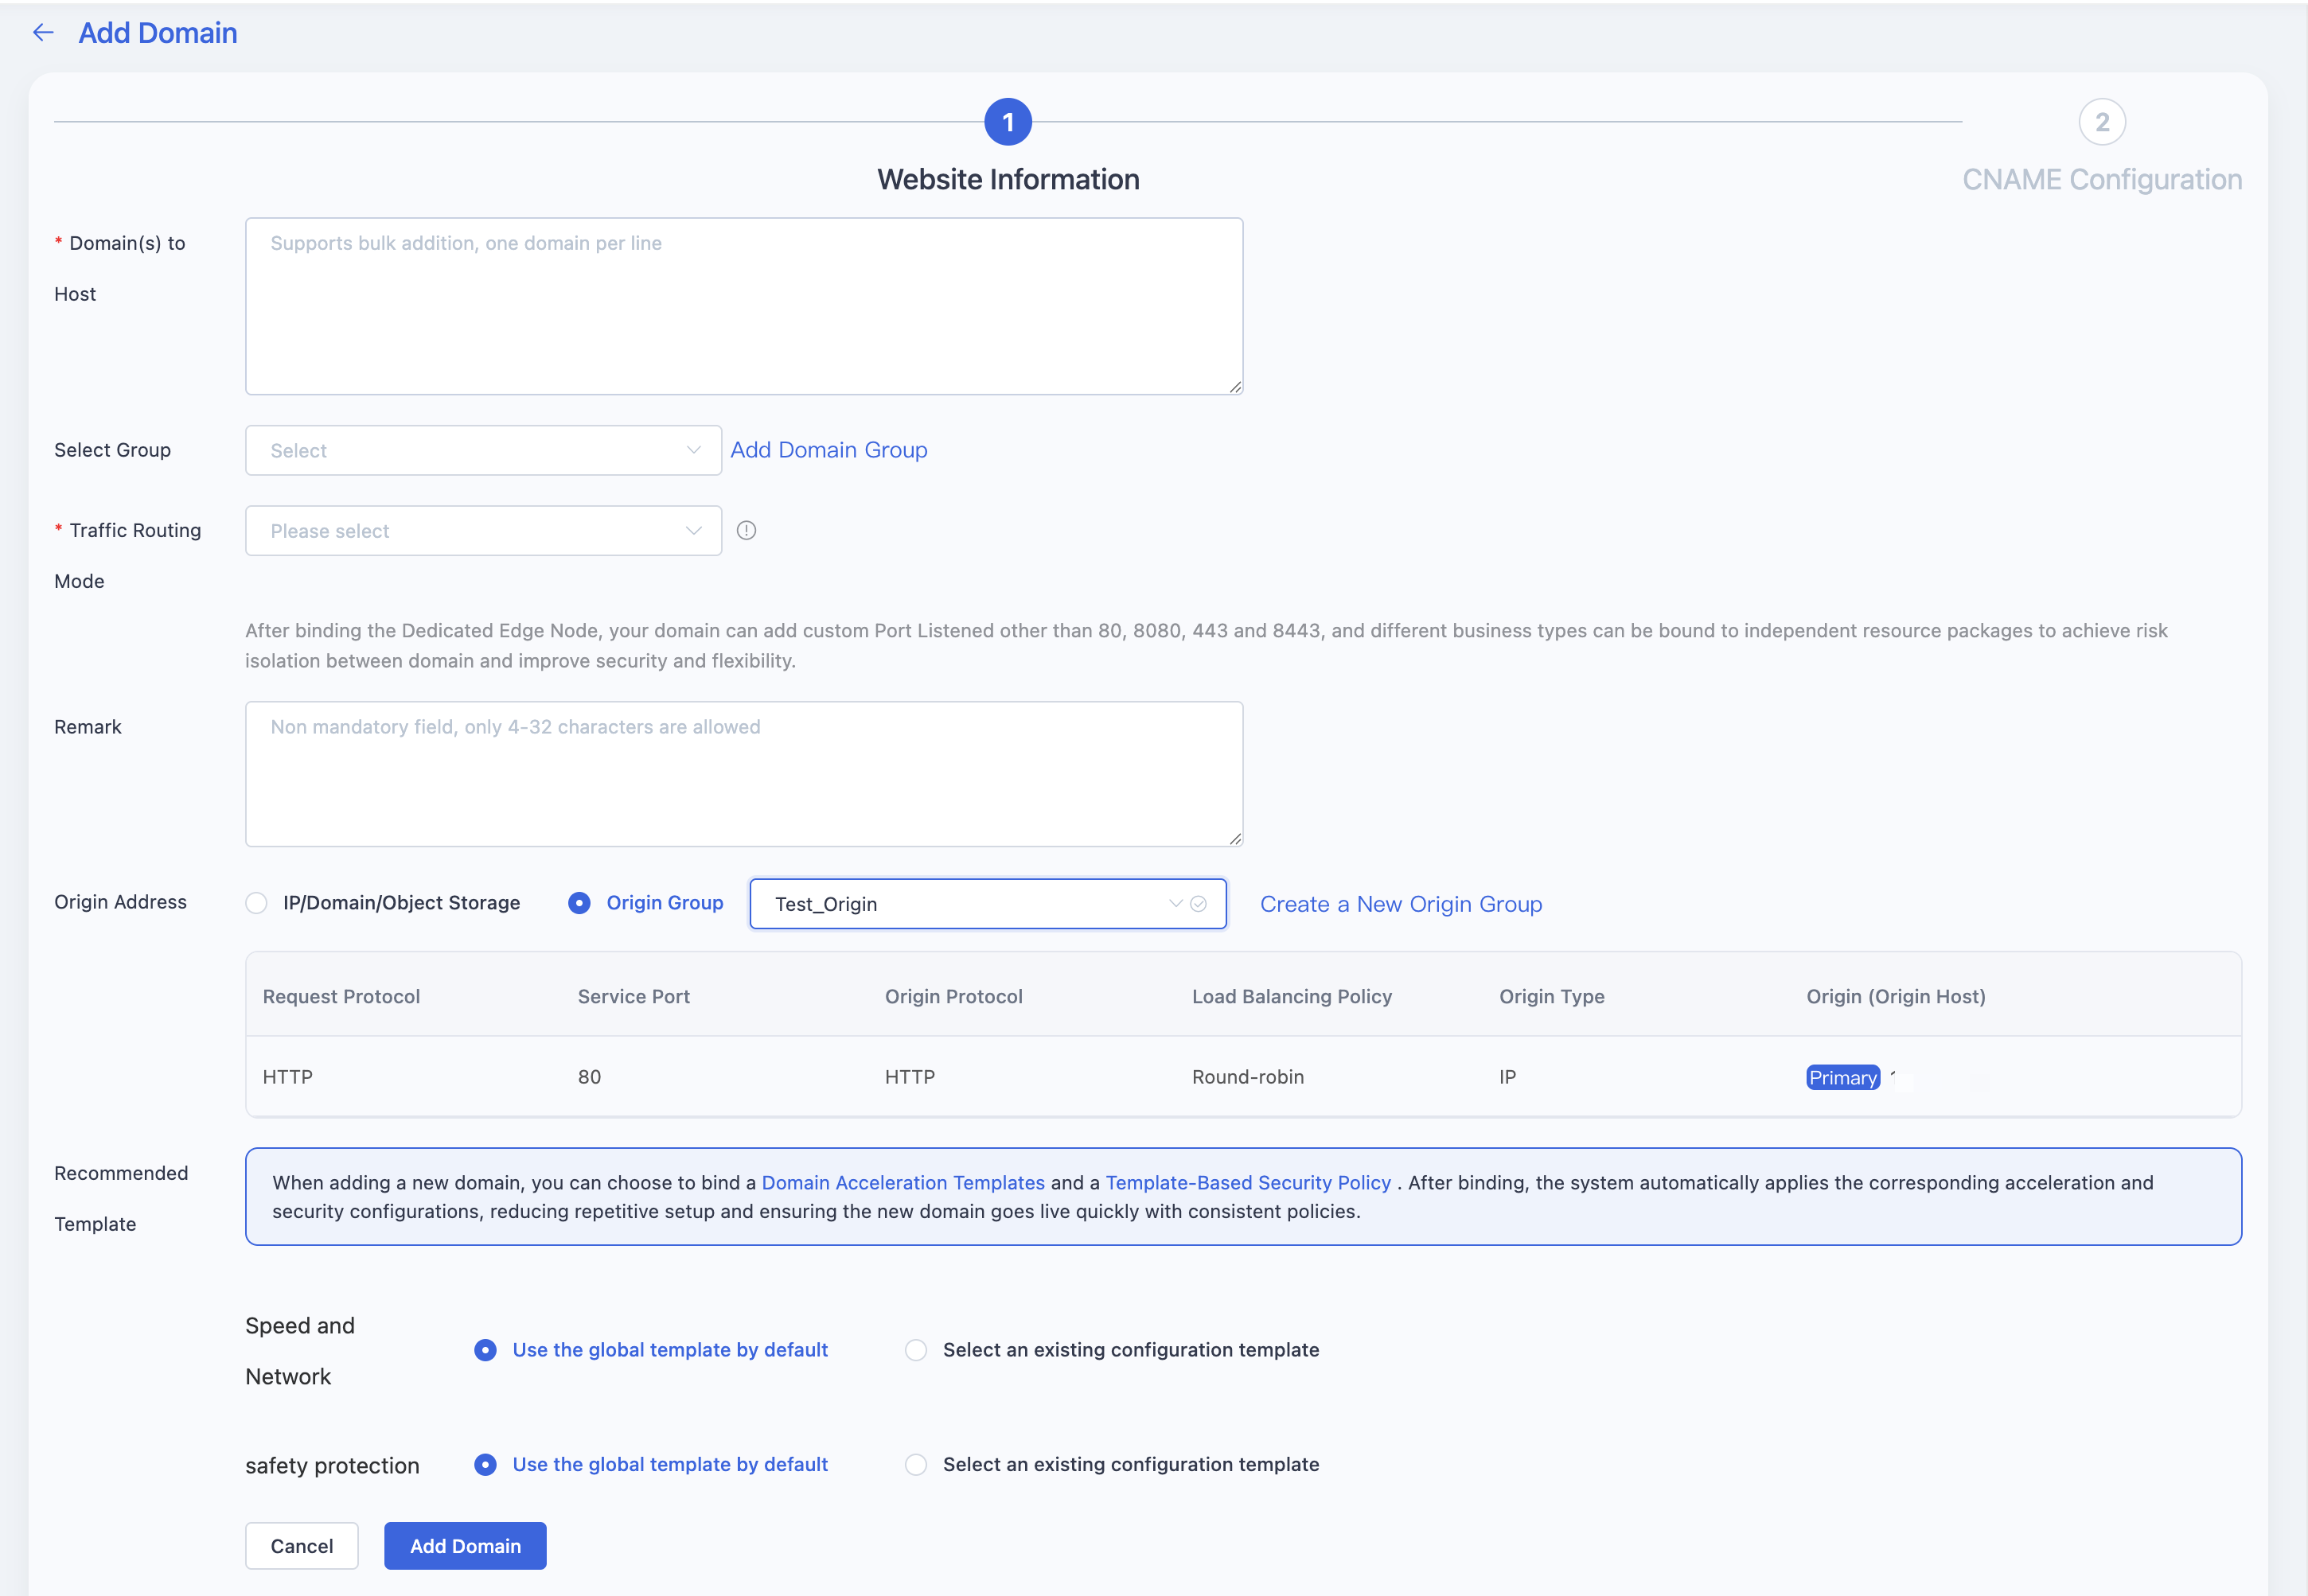
| Domain Information | Description |
|---|---|
| Protected Domain | Enter the domain(s) to be accelerated via Security CDN. Press Enter to separate multiple domains. Notes: Wildcard domains are supported and will apply to all subdomains. Duplicate domains are not allowed. If the domain already exists, please submit a support ticket. Chinese domain names are not supported. |
| Group Selection | Optionally assign the domain to a group for easier centralized management and batch operations. |
| Resource Package | Newly added domains use Security CDN shared edge node resources by default, but can be bound to dedicated edge nodes. Advantages of Dedicated Edge Nodes: Allows use of custom ports beyond 80, 8080, 443, and 8443. Reduces risks of shared IPs, enhancing stability, security, and brand credibility. |
| Remarks | Optional. Allows 4–32 characters including Chinese, English letters, numbers, and common special characters. |
| Origin Address | Refer to Origin Configuration. |
| Configuration Template Selection | When adding a new domain, the platform provides Speed & Cache and Security configuration templates to help you quickly apply performance optimization and security policies without configuring each setting from scratch. Speed and Network templates use the Global Configuration Template by default. You may also choose from the following predefined templates based on your business requirements: Website Acceleration: Optimized for web content delivery to improve page load speed and user experience. Large File Download: Designed for large-file delivery scenarios, such as application packages, game installers, and other downloadable content. Custom Template: If you have previously created custom acceleration templates, you can directly apply them to the new domain for rapid deployment. Security templates use the Global Configuration Template by default. You may also select any existing Custom Security Template to apply your established security policies to the new domain with a single click, ensuring consistent protection across your services. |
Access Modes
CNAME Mode
In CNAME mode, you configure a CNAME record in your domain’s DNS settings to point your business domain to a Security CDN acceleration domain. This enables acceleration, caching, and protection features by forwarding requests through Security CDN.
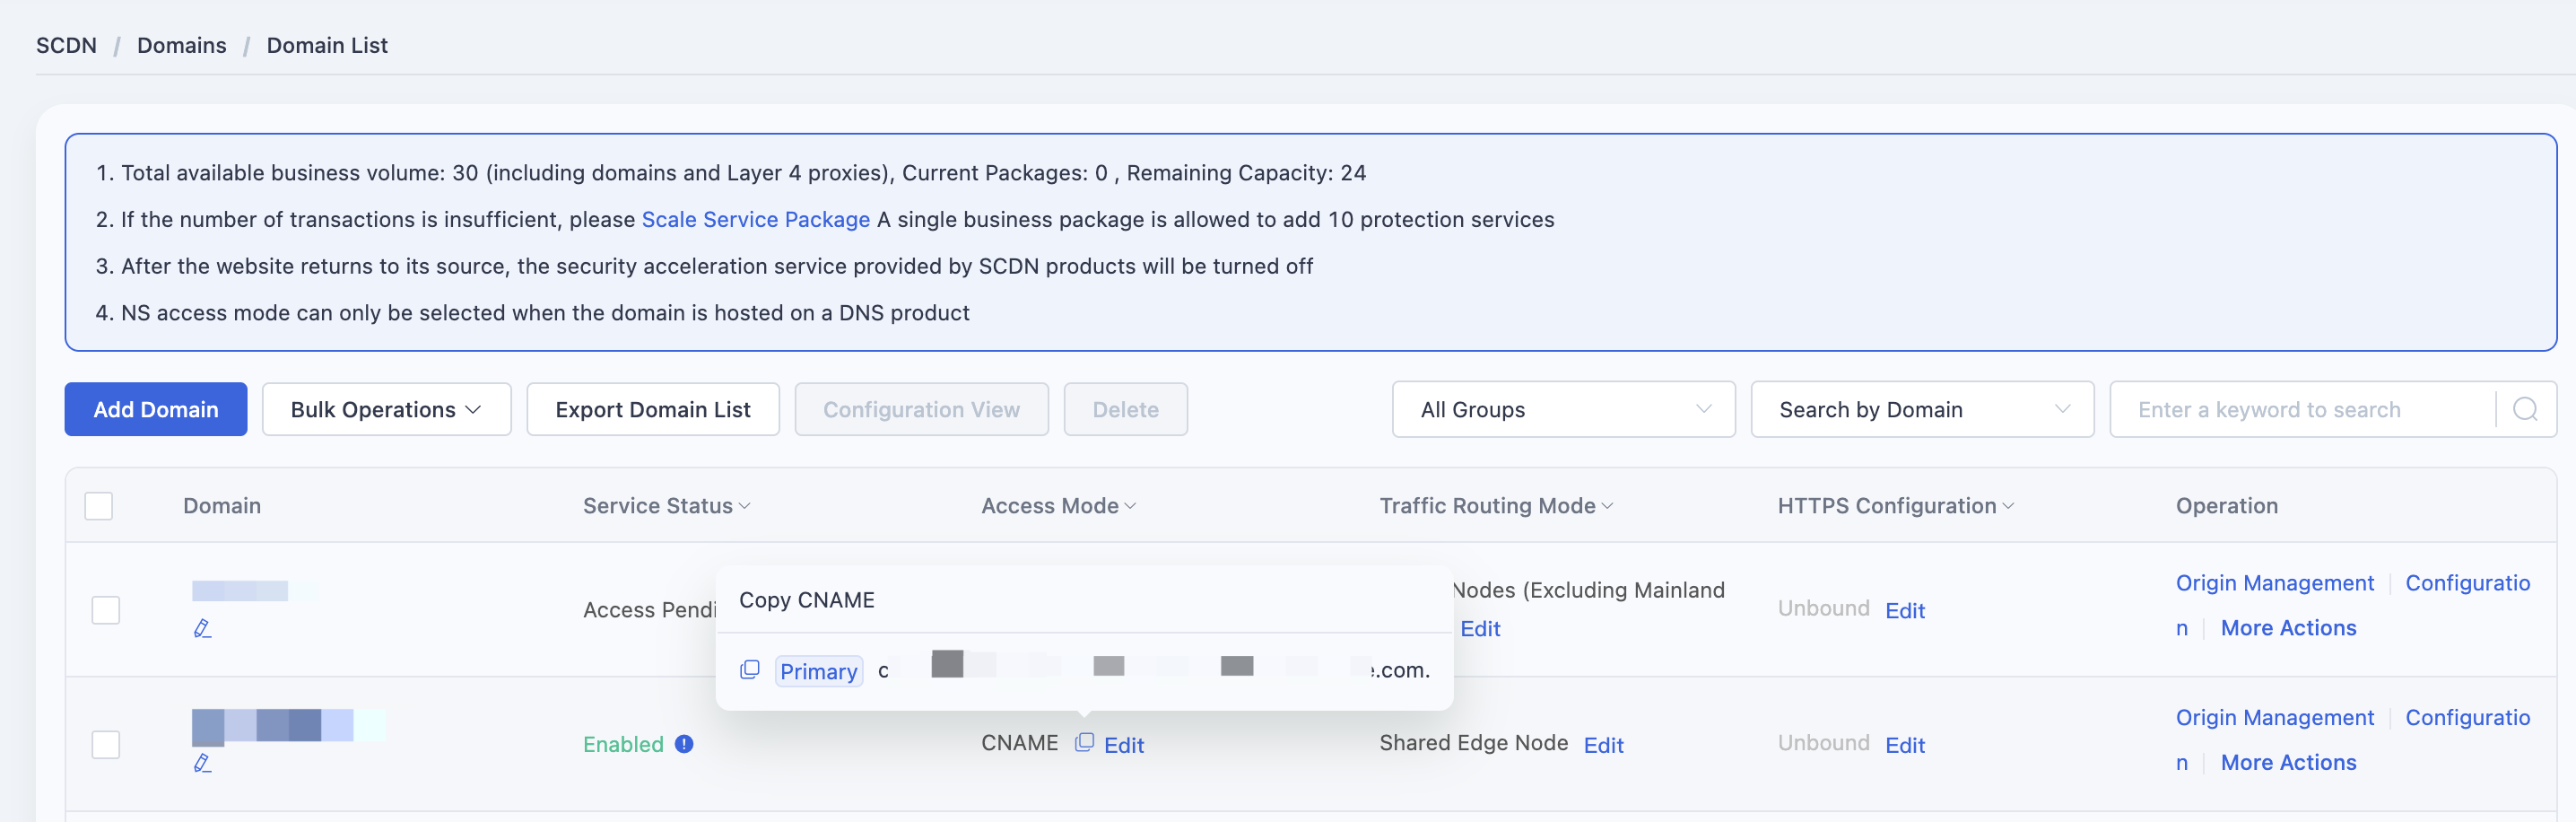
- Once the domain is added, the system will assign a CNAME value.
- Go to Domain List → Access Mode, click Copy to get your assigned CNAME.
- Then visit your DNS provider (e.g., Cloudflare, GoDaddy, Alibaba Cloud, DNSPod, etc.) and add the CNAME record.
- Wait for DNS propagation (typically a few minutes to several hours).
- Once the CNAME is detected and resolved by Security CDN, the domain will be considered successfully integrated.
NS Mode
This mode requires that the domain be hosted on EdgeNext DNS Security Acceleration Service, and have either an A record or CNAME record already added.
- First, migrate your domain to EdgeNext DNS Security Acceleration, then add the appropriate A or CNAME record for the relevant hostnames.
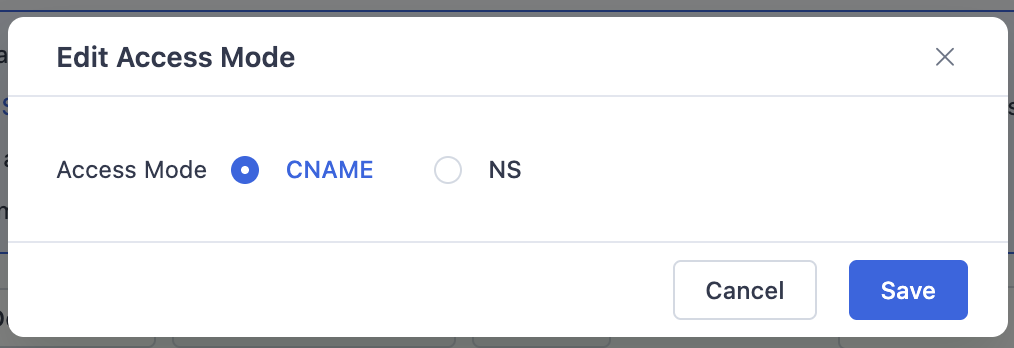
- In the Domain List → Access Mode, click Edit, then select NS Mode.
Verify Integration
To confirm that Security CDN is active:
- After adding the CNAME record or enabling NS mode, wait for 3–5 minutes.
- Perform a local ping test using your accelerated domain.
- If the response shows the assigned CNAME value or resolves to a Security CDN edge node, it indicates the service is working properly.
Need help? Contact our support team at support@edgenext.com.
Back to documentation home